[Tutorial] Create a Gingerbread Cookie in Photoshop
 In this Photoshop Tutorial we’ll create a yummy Gingerbread Cookie in Photoshop using custom patterns, textures and layer styles
I was preparing some gingerbread cookies, they looked so nice that I created one in Photoshop and the result is quit yummy. Let’s jump into the baking process.
 Step 1 - Cookie Textures Part 1
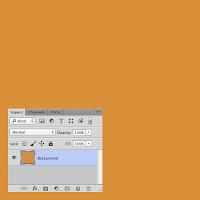
Before creating the Gingerbread Cookie we need some cookie textures, let’s starts by creating the first one, create a new document in Photoshop, mine is 500x500px and fill the background layer with a light brown colour, #D28F41.

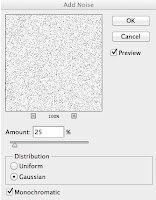 Create a new layer, fill it with white and apply a Noise filter, Filter - Noise - Add Noise, with 25% for the amount, Gaussian for the distribution and Monochromatic. Change the Fill of the layer to 25% and the Blend Mode to Soft Light.
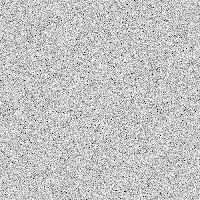
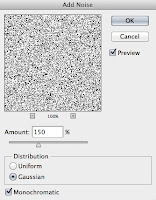 Create a new layer, fill it with white, add noise on this layer with the Noise Filter, this time with an amount of 150%. Then Invert the colours on this layer, Image - Adjustments - Invert. Change the Fill of this layer to 5% and the Blend Mode to Screen.
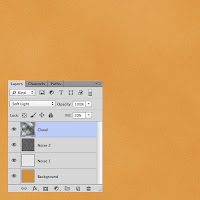
 Step 2 - Cookie Textures Part 2
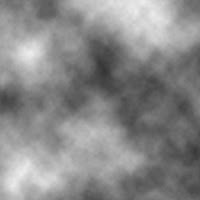
Create a new layer, fill it with white and apply a Clouds filter, Filter - Render - Clouds. Change the Fill of this layer to 20% and the Blend Mode to Soft Light. Now the texture is finished, select all the canvas, Select - All then go to Edit - Define Pattern. We’ll use this pattern later in the Tutorial.
For the second texture, just copy the image below, open it in Photoshop and save it as a Pattern.
Step 3 - Body Part 1
Let’s now create the Body of our cookie, select the Pen Tool (P) and start creating the left part of the cookie, when you like the result, duplicate this shape and use the Free Transform Tool (Ctrl+T) to Flip it Horizontally, Right Click - Flip Horizontal then drag it on the right to complete the cookie body shape.
Select the Ellipse Tool (U) and create head shape. Merge the 3 shapes and rasterize them. Layer - Rasterize - Shape. duplicate the Gingerbread Cookie shape, hide the duplicated shape, we’ll use it later.
Let’s add some colours and textures on this shape using some Layer Styles and the first Pattern we created with those values:
Step 4 - Body Part 2
Unhide the duplicated layer of the Gingerbread Cookie shape and apply those Layer Styles:
Step 5 - Icing Decorations Part 1
Now our cookie looks cooked we can add some icing decorations, start by create the Eyes and Buttons using the Ellipse Tool (U) when that’s done use the Brush Tool (B) with a Rounded brush and black create the mouth an the decorations on the arms and legs.

We’ll use some more Layer Styles on those shapes to create the Icing effect, feel free to play with the values, you can have some nice results.
Step 6 - Icing Decorations Part 2
Those icing decorations look nice but we can add more light on it using the Plastic Wrap Filter, Duplicate those Icing shapes, select them all and press Ctrl+Alt+E, this will create a new layer with all those shapes together then go to Filter - Filter Gallery - Artistic - Plastic Wrap with those Values:
To finnish just change the Fill of this new layer to 50% and add any background you like, I added a Wood texture behind the cookie.
Final Preview
Previous Tutorial Next Tutorial


![[Hack] DomiNations V2.0.81 LATEST VERSION JAILBREAK](https://blogger.googleusercontent.com/img/b/R29vZ2xl/AVvXsEgs6SJAU-z94ah7z-edusl2FHUiup6ZreQFeN5A9wjW5JxN0OrUrW6xmxEWP6cRTdX1gMi6dW1DEhUz700IB-PBuk1u1uzZ0ERCgldqLeuMgGhbfz-wCw-phIhyphenhyphen9Ks2zpoO_mDa8lrxvLv7/s72-c/10458386_338295233048481_6718903324450773386_n.jpg)

0 comments: