Tutorial - Flying Girl Photo Manipulation
Make this wonderful image of a flying girl by mixing all the images and painting the girl itself within the photoshop
Resources needed:
Step 1:
Open the sky image in a new document. Draw the girl on a new layer.
Step 2:
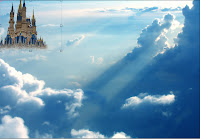
I have turned off the girl layer for now. I have extracted the castle and erased the bottom and the sides of it with a soft brush.
 HOW I EXTRACTED THE CASTLE
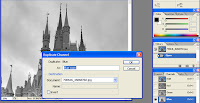
Open the castle image. Go to Channels and duplicate Blue Channel
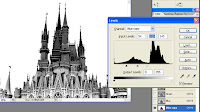 Now Press CTRL+L to open levels. Set the values as shown.
Now choose Magic Wand and select the sky.
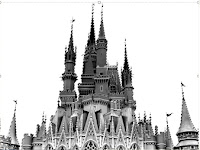 Now go to Select > Inverse to select the castle.
Now duplicate the background layer.
Now add Layer Mask to the duplicated layer and hey ur castle is masked!
Step 3:
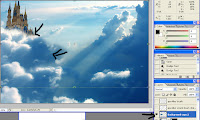
Now i duplicated the sky layer and moved it a little up to cover the castle, and erased the whole sky except the fluffy clouds.

 Step 4:
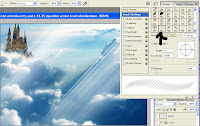
Download the sparklies brushes from obsidiandawn. Select the accent brush and draw some rays as shown below.
Download light beams brushes and draw the light beams.

Now download the bird image and mask it, I have flipped it horizontally to match the light source and re-size it.
Keep duplicating and resizing the birds. Your image will look like this now.
 Step 5:
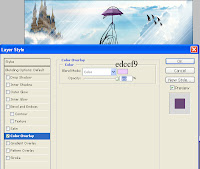
Now download the umbrella image and extract and re-size it. Apply Color Overlay to it.
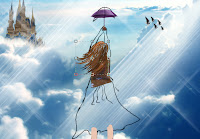
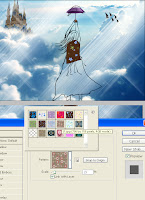 Now i start making the girl. Draw the top part of her dress using Pen Tool and apply Pattern Overlay. The patterns are downloaded from obsidiandawn. Start drawing her hair. Use different shades of brown. Paint her legs too with a base color

Paint her dress with a base color( I chose blue). Painted more details to her hair.

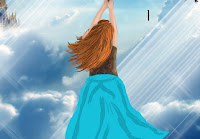
More painting to her hair. Use different colors of brown to add depth to her hair. Paint her hands too.
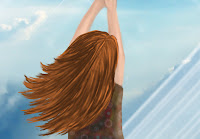 A closer view of her hair. Use Smudge Tool and take stipple brush and start smudging her hair.
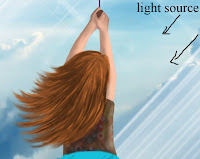
Keep smudging her hair until u get the flying look. Paint her hands with low opacity. Select different shades of skin color for her hands or u can sample from my image and then paint.
Use Smudge Tool to blend the skin colors. Don't rush in to paint. Take your time to paint. Keep in mind the direction of light source.
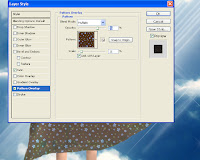
Apply Pattern Overlay to her skirt. The pattern is downloaded from obsidiandawn. The settings are as shown.
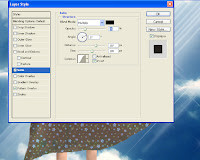
Apply Satin Effect to the skirt. Settings are shown.
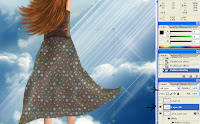
Add a new layer, mode is Soft Light. Paint her skirt with white brush with low opacity.
Now add a new layer again with Overlay Mode. Select black color and paint with low opacity.

Now your image looks like this.
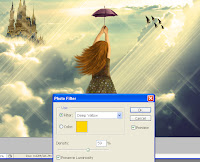
Step 6:
Apply Photo Filter. Settings are shown.
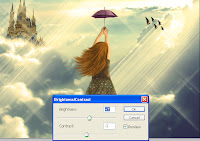
Apply Brightness/Contrast
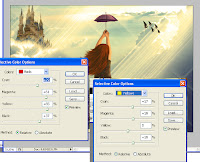
Apply Selective Color
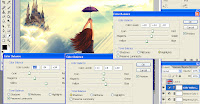
Apply Color Balance. Settings are shown below.
Previous Tutorial Next Tutorial (coming soon)
Resources needed:
Castle LINK
Sky LINK
Bird LINK
Umbrella LINK
Pattern brush LINK
Light brush LINK
Sparklies brush LINK
Please Click Image To Enlarge Them
Step 1:
Open the sky image in a new document. Draw the girl on a new layer.

Step 2:
I have turned off the girl layer for now. I have extracted the castle and erased the bottom and the sides of it with a soft brush.
 HOW I EXTRACTED THE CASTLE
Open the castle image. Go to Channels and duplicate Blue Channel
 Now Press CTRL+L to open levels. Set the values as shown.
Now choose Magic Wand and select the sky.
 Now go to Select > Inverse to select the castle.
Now duplicate the background layer.
Now add Layer Mask to the duplicated layer and hey ur castle is masked!

Step 3:
Now i duplicated the sky layer and moved it a little up to cover the castle, and erased the whole sky except the fluffy clouds.

 Step 4:
Download the sparklies brushes from obsidiandawn. Select the accent brush and draw some rays as shown below.
Download light beams brushes and draw the light beams.

Now download the bird image and mask it, I have flipped it horizontally to match the light source and re-size it.
Keep duplicating and resizing the birds. Your image will look like this now.
 Step 5:
Now download the umbrella image and extract and re-size it. Apply Color Overlay to it.

 Now i start making the girl. Draw the top part of her dress using Pen Tool and apply Pattern Overlay. The patterns are downloaded from obsidiandawn. Start drawing her hair. Use different shades of brown. Paint her legs too with a base color
Paint her dress with a base color( I chose blue). Painted more details to her hair.


More painting to her hair. Use different colors of brown to add depth to her hair. Paint her hands too.
 A closer view of her hair. Use Smudge Tool and take stipple brush and start smudging her hair.
Keep smudging her hair until u get the flying look. Paint her hands with low opacity. Select different shades of skin color for her hands or u can sample from my image and then paint.
Use Smudge Tool to blend the skin colors. Don't rush in to paint. Take your time to paint. Keep in mind the direction of light source.

Apply Pattern Overlay to her skirt. The pattern is downloaded from obsidiandawn. The settings are as shown.

Apply Satin Effect to the skirt. Settings are shown.

Add a new layer, mode is Soft Light. Paint her skirt with white brush with low opacity.
Now add a new layer again with Overlay Mode. Select black color and paint with low opacity.

Now your image looks like this.

Step 6:
Apply Photo Filter. Settings are shown.

Apply Brightness/Contrast

Apply Selective Color

Apply Color Balance. Settings are shown below.
Previous Tutorial Next Tutorial (coming soon)


0 comments: