[Tutorial] Creating Light Effects to a Photo
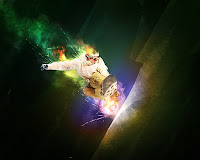 In this Photoshop Tutorial we will learn how to give enchantment to an ordinary photo by adding some colorful light effects
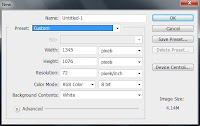 Step 1
Let’s start by creating a new document of 1345 pixels wide and 1076 pixels high.
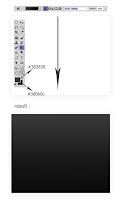
Step 2
Now set the foreground color to #383838 and the background color to #0d0b0c. Take Gradient Tool in the tool panel and set the gradient to Linear Gradient with normal mode at 100% opacity. Fill the white document with gradient by clicking and dragging the gradient tool from top to bottom. Please see the result I did in the illustration picture:
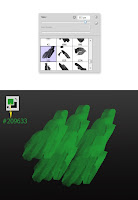 Step 3
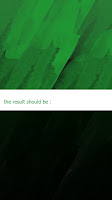
Next, we will add the background with some textures. Firstly, create a new layer (Shift+Ctrl+N) and then set the foreground color to #209633. Now, take Brush Tool in the tool panel. Make sure that the brushed inks have been installed in photoshop. Pick one of the brushes. Set the size of the brush to 500-600 pxl and stroke it on the new layer. Please refer to the the illustration picture to see the result I did as your reference:
 Step 4
With free transform tool, scale the texture up to fill the canvas. Then, set it to multiply blending at 100% opacity. Duplicate (Ctrl+J) the texture layer two times and keep them with the same blending mode and opacity as the original one.
 Step 5
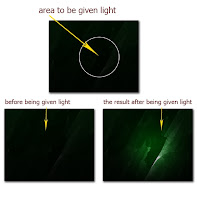
The background with its texture is a bit too dark. We need to enlighten it. Create another new layer underneath the texture layers. Take a very soft round brush with about 600-700pxl size. With the new layer still selected, click the brush with white color on the most centered part of the canvas. See the illustration to know what should do in this step. The mark with white circle is the part to be enlightened. I named this layer light.
 Step 6
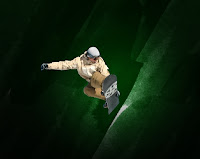
We have done with the background so far. We will add a model to the scene. Open the model stock picture. What to do now is extracting the model from its background. Just take Pen Tool. Start creating the starting point anchor by clicking on the edges of the model (I started from the head)(1). Keep on tracing the model until the path is closed indicated by thin line around the model. Right click on the path to show up the path command option box. Choose Make Selection..(2). The model is selected now(3). Hit Ctrl+J to duplicate the selected model into a singel layer. Hide the background by clicking the eye icon. Here is the result (4).
Step 7
Add the model to the scene. Place and scale it as needed.
 Step 8
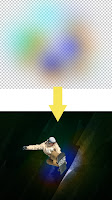
Create a new layer again underneath the model and set this new layer to Color Blending. With a very soft brush at 40-50% opacity, paint some color we like. As your inspiration, please take a look at the illustration picture to know what colors I used in this step. We can opt any colors we like. I named this layer color.
 Step 9
Again, create another new layer above the color layer. Fill Shift+F5 this layer with 50% gray. With this new layer selected, go to filter > render > lens flare. Please take a look at the illustration for the setting of the lens flare. Finally, set this layer to Overlay blending at 100% opacity. I named this layer flare.
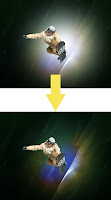
Step 10
I decided to duplicate the light layer (in step 5) and place the duplication layer above the flare layer. Reduce the opacity of this layer to 20%. Let’s just name this layer : light 2.
 Step 11
What we are going to do now is creating something like ‘sparks’ (I don’t know exactly what they are, but I just call them ‘spark’ hehehe…). Ok, please follow these steps:
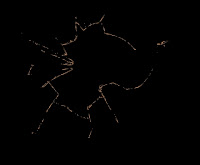
First of all, make sure you have had the shatter glass brushes in photoshop. Create a new document of 800pixels wide and 800pixels high. Then, activate the Brush Tool and choose one of the shatter glass brushes. Now create a new layer on which we should click the chosen brush with any color but black of course. (I chose white for this step). I named this layer shatter glass.
With the shatter lass layer still selected, go to Select > Load Selection. This action will select the shatter glass painted on this layer.
After selecting the shatter glass, go to Path on the layer panel and click “Make work path from selection” icon located in the bottom of the panel. By clicking the icon, we change the selection into work path.
Go back to layer panel. We can see that the selection on the shatter glass has been changed into a work path. Then, make sure to set the color of the foreground to #fc7e03 (or you can use any bright color you like) and set the brush tool to a very hard round brush with 1-2 pxl size. Create another new layer and fill it black. We will create the spark on this layer. So I named this layer spark. Now activate the Path Tool. With the spark layer selected and the pen tool activated, right click on the path to show up the path command option box. Choose Stroke Path. When the Stroke Path command window comes up, select Brush as the tool and uncheck Simulate Pressure.
Now we have spark.
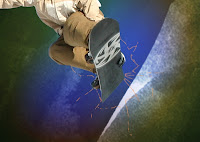
Step 12
Just add the spark to the main document and place it underneath the light 2 layer. Set it to color dodge blending at 100% opacity.
 Step 13
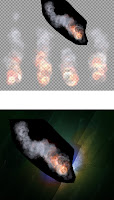
Next, open the smoke stock picture on the canvas. Cut out the part we need. Place the cut out where needed.
 Step 14
We need to modify the smoke. What I did was duplicating the smoke one time. Scale and arrange the duplication layer. Then, set it to screen blending mode. Finally, merge the two smoke layers into a single layer. I named this layer smoke1. Place this layer above the model layer.

Step 15
Try to place this smoke in such position that the flame part of this picture is on the ski board of the model picture. (Set the transparency of the smoke layer by reducing its opacity to locate it on the position we want). Then, set this layer to color dodge at 100% opacity and mask some unnecessary parts.

Step 16
Duplicate the smoke1 layer. Place the duplication on the position that the flame is near the head of the model. Mask some unnecessary parts. Then, go to Filter > Blur > Motion Blur. Finally, set this layer to color dodge blending. I named this layer smoke2. Please take a look at the illustration for your inspiration on what to do in this step.
 Step 17
Once again, duplicate the smoke layer. I named this duplication layer smoke3. We still do almost the same ways as the ones in previous step 15. Please see the illustration for your inspiration:
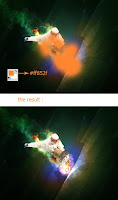 Step 18
I decided to add more nuance to the smoke3 layer. So on a new layer I painted some color (#ff852f). I give this layer Clipping Mask (Alt+Ctrl+G). Finally I set this layer to color blending at 100% opacity.
 Step 19
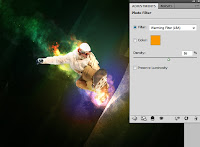
Next, we will give the scene a new adjustment layer. Go to Layer > New Adjustment Layer > Photo Filter. Place this new adjustment layer underneath the three smoke layers. Set it to normal at 70% opacity.
 Step 20
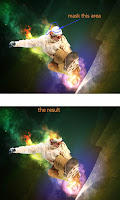
Now we will do enchantment to the model. Select the model layer. Mask some parts of the head to show up the fire effect created in step 16. Use a very soft round brush at low opacity (10-20pxl) to mask the head.
Step 21
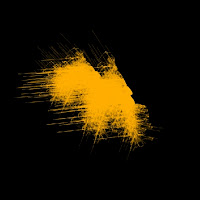
In this step we will do more efforts to enchant the model. What to do first is creating a shape like the one in the illustration picture below. I created this shape by stroking shatter glass brushes. After trying and error, finally I created the final shape.

Step 22
Add the shape to the canvas. Scale, place and arrange the position in front of the model(1). Mask unnecessary part (2). Duplicate the model layer and place the duplication layer right above the shape layer(3). Create this duplication layer Clipping Mask. The clipping mask is indicated by a small downward pointing arrow(4).
 Step 23
Next, select the duplication layer and the shape layer. Merge them to create a new single layer. I named this layer grunge(1). Then, set this grunge layer to color dodge at 100% opacity(2). Finally, mask unneeded parts(3).
 Step 24
I decided to give more light to the spark created in step 11. To do this, duplicate the spark layer as needed and place all the duplication layers above all the other layers. Set them all to color dodge blendings at 100% opacity.
 Step 25
In this step we will add more sparks to the scene. Please refer back to the previous step 11 to create the spark. In this step we can opt to any colors we like in creating the spark. Do not just stick exactly to the same result I have created. Try to do experiment with colors in this step.
Step 26
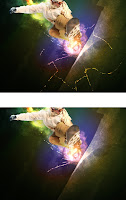
Add the spark to the scene. Mask some parts unneeded. (please take a look at the illustration picture). Try to duplicate it as many as you need. Set all the duplication layers to color dodge at 100% opacity. Place them all underneath the light 2 layer (step 10).
 Step 27
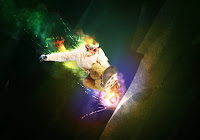
Do almost the same things as those in step 16 to add more spark around the arm and shoulder. The illustration below will inspire you about what to do in this step :

Step 28
Finally, select the top most layer on the layer panel. Hit Shift+Ctrl+Alt+E to stamp all visible layer into a single layer. Then, with the stamped layer selected, go to Filter > Others > High Pass. Set this layer blending to Overlay at 100% opacity. See the illustration picture for the high pass setting. Now take Dodge Tool in the tool panel. Set its range to highlight with low exposure at 8-10%. Choose a very soft round brush to stroke some area on the canvas as marked in blue in the illustration picture:
Step 29
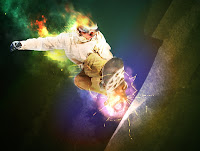
There we go we got the final result
Previous Tutorial Next Tutorial


0 comments: