Combine a Crocodile with a Car to Create an Exotic Crocomobile
 Learn
how to merge animals in Photoshop with this tutorial that will teach
you how to chop photos and blend them together. This is a simple
tutorial but to get great results, you'll need some patience, an eye for
details, and some imagination. Read this tutorial and find out how you
can easily create your own animal-vehicle creation in Photoshop
Learn
how to merge animals in Photoshop with this tutorial that will teach
you how to chop photos and blend them together. This is a simple
tutorial but to get great results, you'll need some patience, an eye for
details, and some imagination. Read this tutorial and find out how you
can easily create your own animal-vehicle creation in Photoshop.
Preview of Final Results

Tutorial Resources
- Crocodile1 – SXC
- Crocodile2 – charadestock
- Crocodile3 – frostdragon64
- Old car – achatinastock
- Background – SXC
- Bird – rml-stock
- sign1 – discordia-stock
- Sign2 – ecathe
Step 1
Open the background image and place it on the right. Because the image in not wide enough we need to duplicate it and complete the empty space with the same photography. Duplicate the background layer and place it on the left. Create a clipping mask and erase the edge of the duplicated layer.

Step 2
In this step we will cut out the car using the pen tool and place it in the desert. Remember cu cut out the windows also .


Step 3
Let’s create the car’s shadow. Create a new layer. Use your imagination to see how this will look. Use the pen tool for this and fill the path with black. Go Filters-Blur-Gaussian Blur and set it to 2,5. Now the the layer’s opacity to 45%.


Step 4
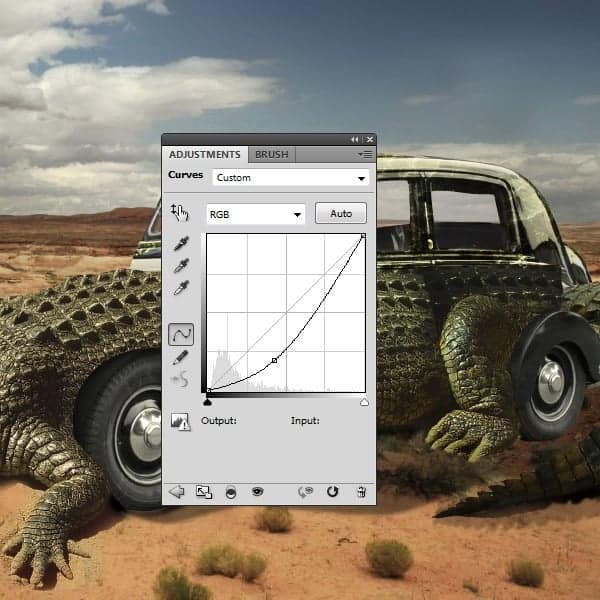
In step 4 you will need to create a few clipping masks for the adjustment layers so we will adapt the car’s colors to the desert. Go to Adjustment Layers-Levels. Make the presets as you see below, and remember that this is a clipping mask, so it only affects the car ( to create a clipping mask you need to press the alt key and click between the layers you want to clip together.)


Step 5
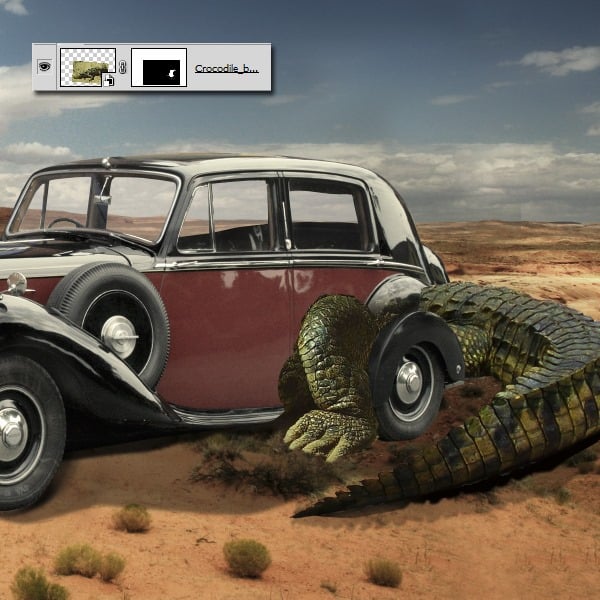
Open the first crocodile photo. We will use the tail from this crocodile. So cut out it and place it at the back side of the car as you see in the image below.


Step 6
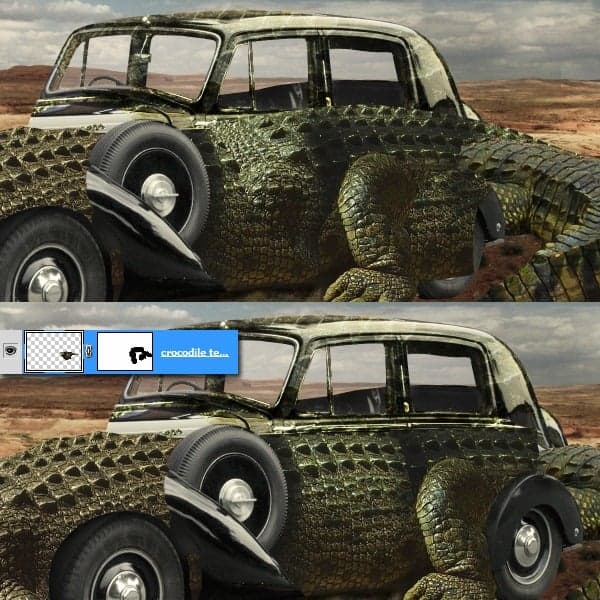
Open the second crocodile photography. We will use this crocodile’s torso for the front of the car and his back will be the texture that we will use to cover the entire car. Also his back leg will be in front of the back wheel.

Step 7
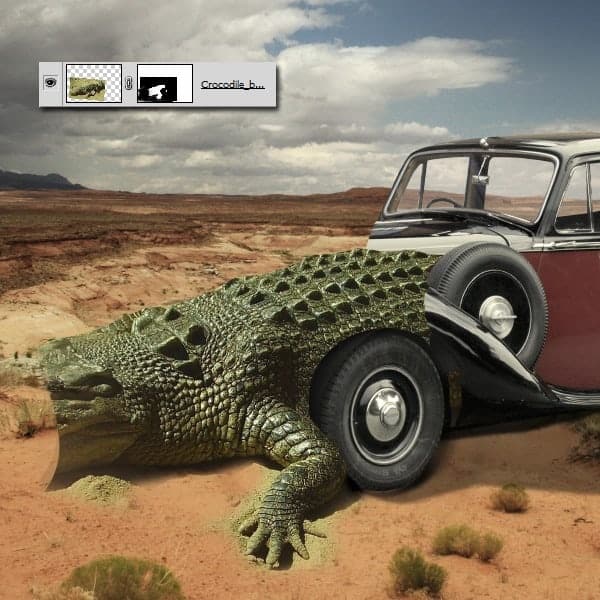
Open the second crocodile photo again and place it in front of the car. Using the layer’s mask erase all the parts that you don’t need. Be careful to leave the front wheel uncovered.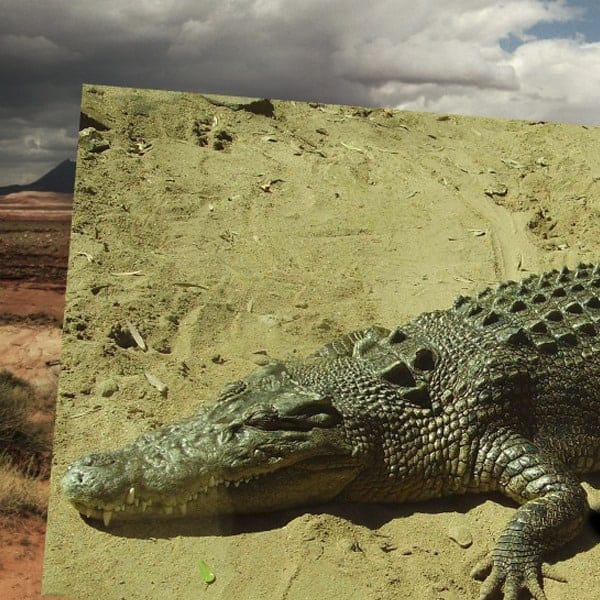


Step 8
In this step we will cover the car with crocodile texture. For this we will use the texture from the crocodile’s back, so using the pen tool cut out the back the marked part.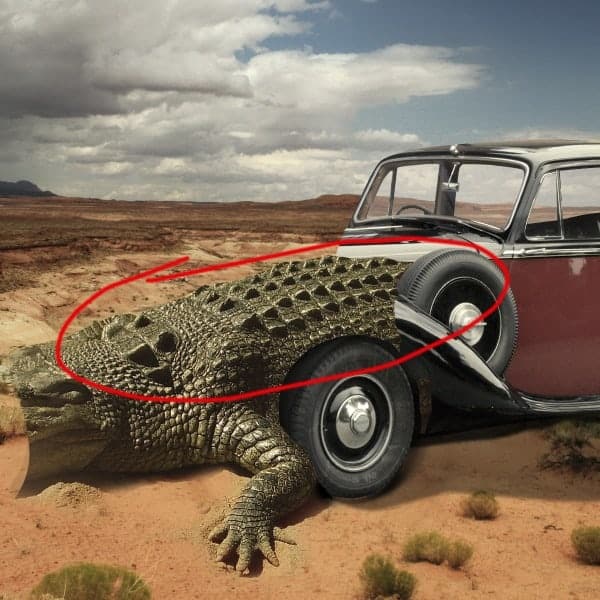
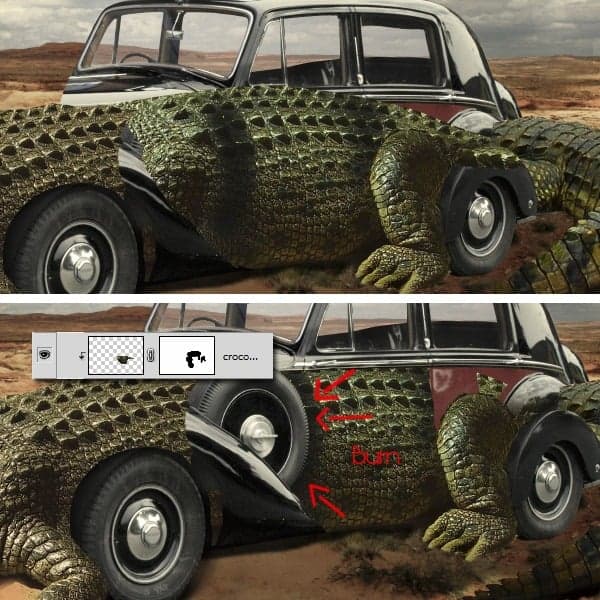
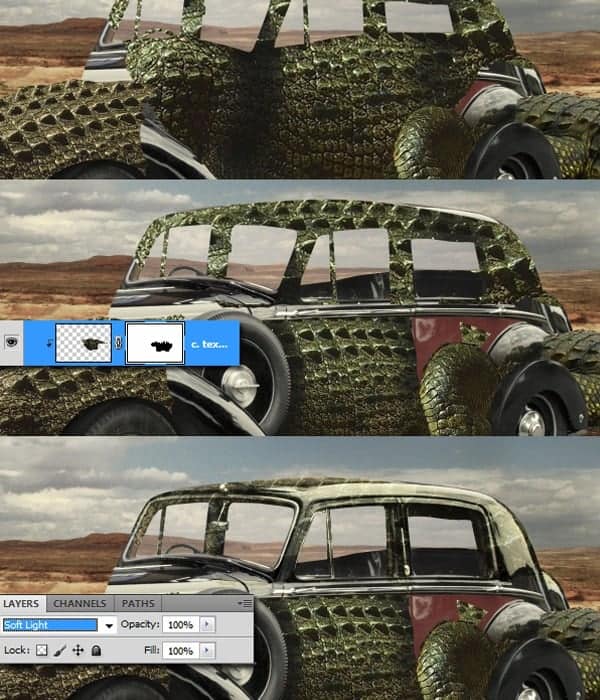
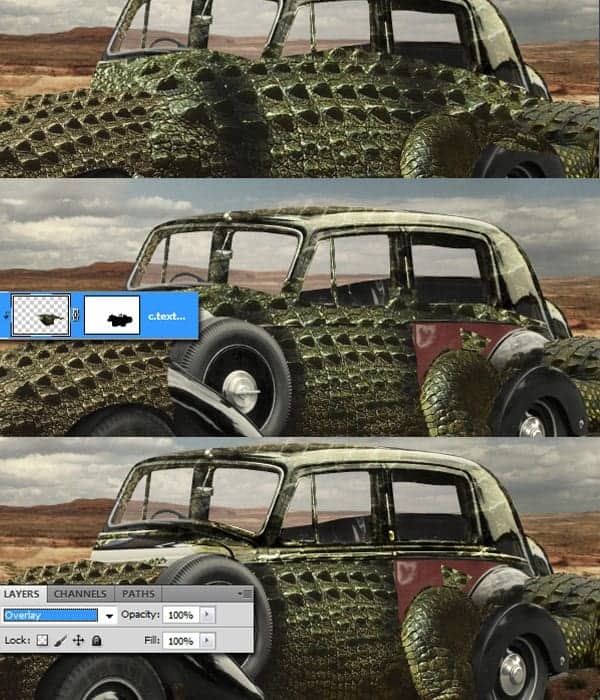
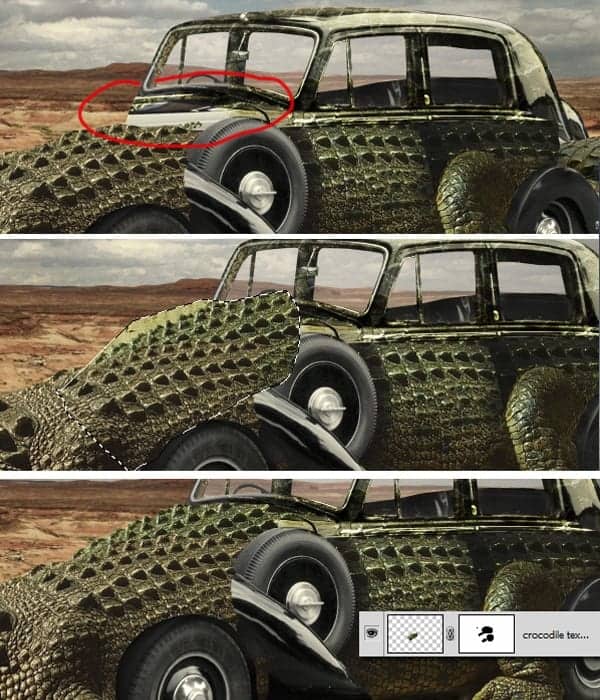

Step 9
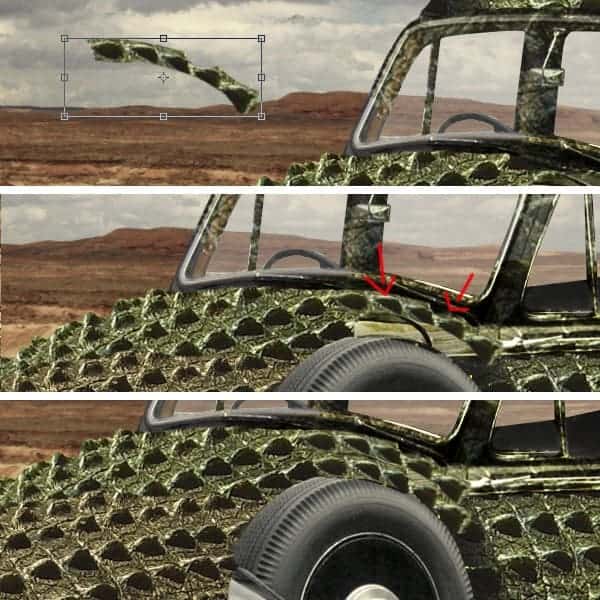
In this step we will cover the last parts of the car that are still left without texture, so go to the crocodile’s layer, because we will use his back again to cover them up. Cut out one row of 6-7 spikes. Use warp to curve it a bit so it will fit on top of the spare tire. After you are done, double the layer and place it near the first one. Now this part is covered. If it doesn’t really fit , don’t worry, because we will use the liquify filter soon, to correct this.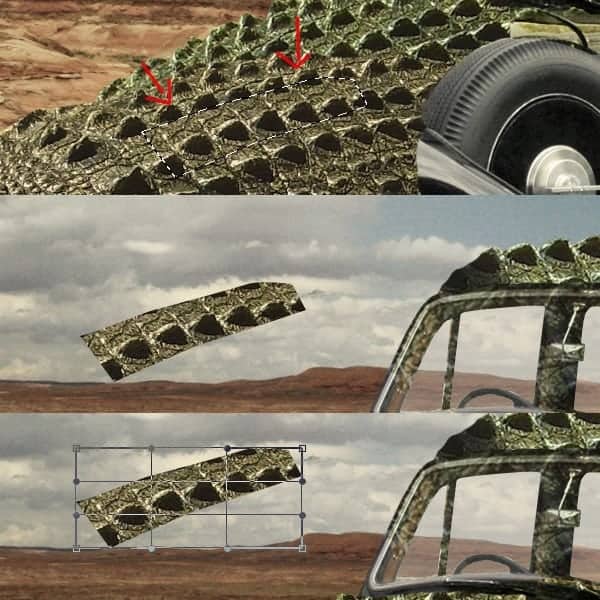
Step 10
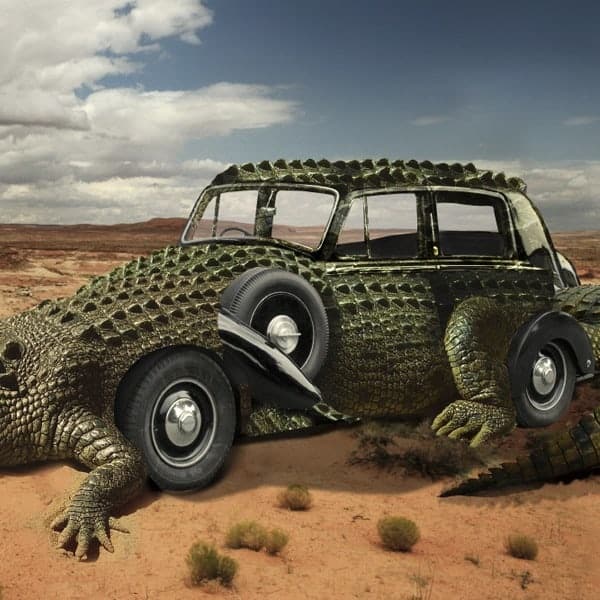
Now that the car is covered we will attach the head. So, open the last crocodile photo and cut it out. Place it under the body’s layer. Create a small shadow . Fill it with black and set it’s opacity to 15%.

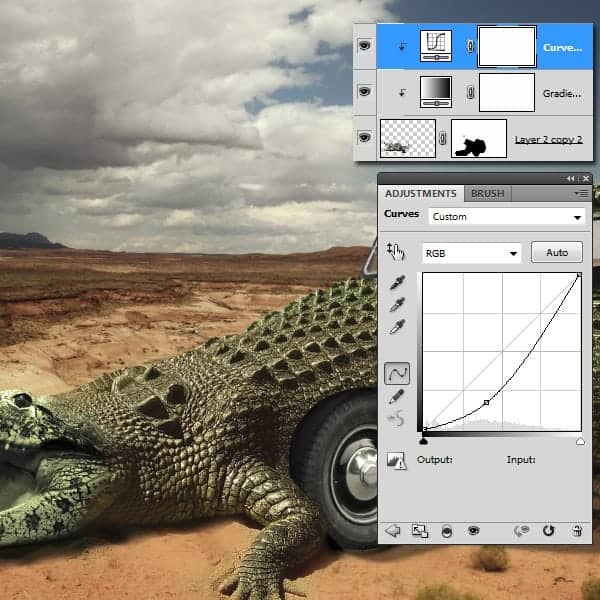
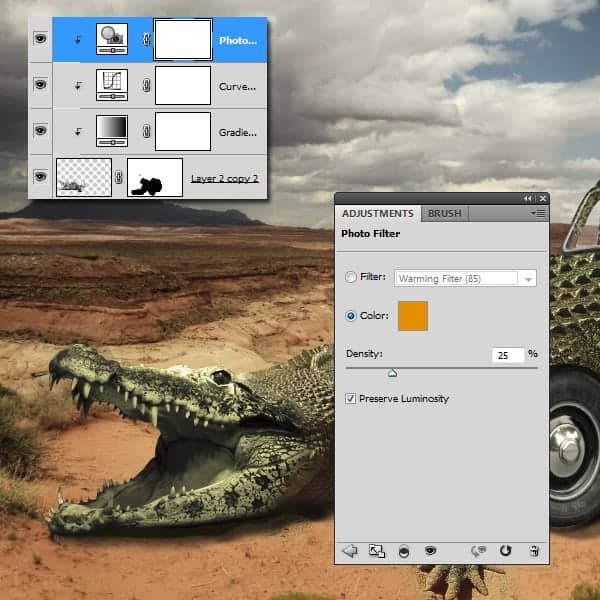
Step 11
Open the bird photo and place it on top of the crocodile to add some color. Cut it out using color range.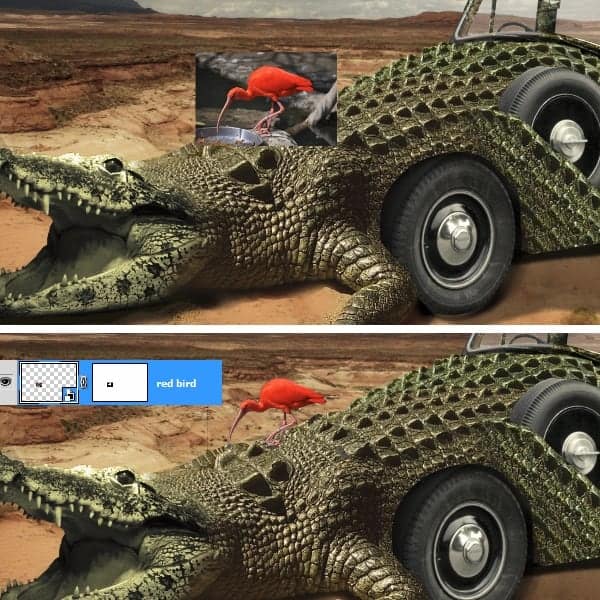
Step 12
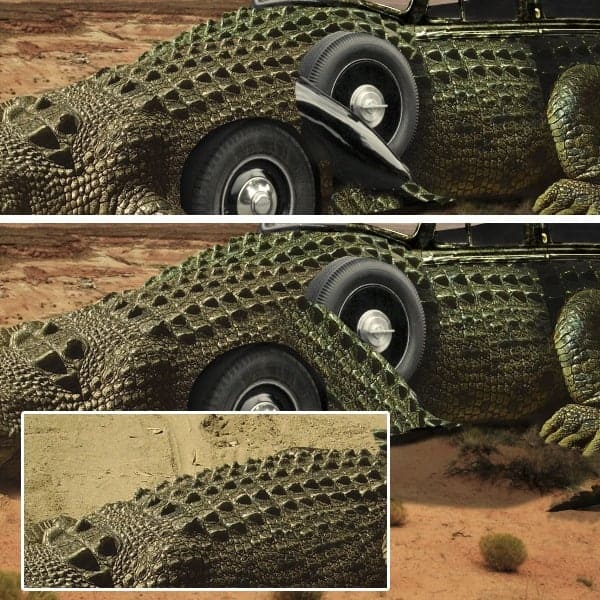
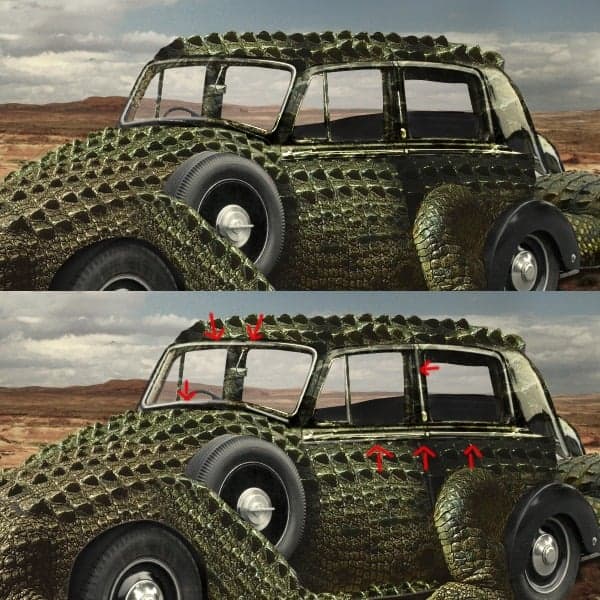
In this step we will make some small fixes, but they will make the whole picture look more blended. So cut out a row of spikes and place them at the door. Next add some light using a basic brush, with white ( opacity 40-50%). This is a small detail but it will look better in the end.

Step 13
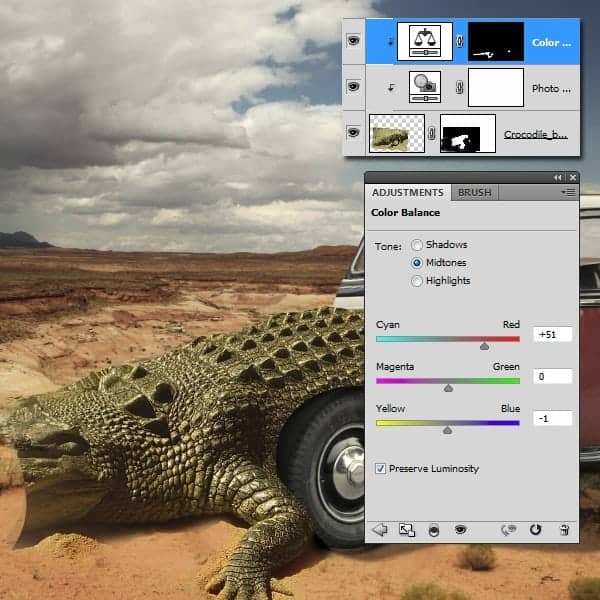
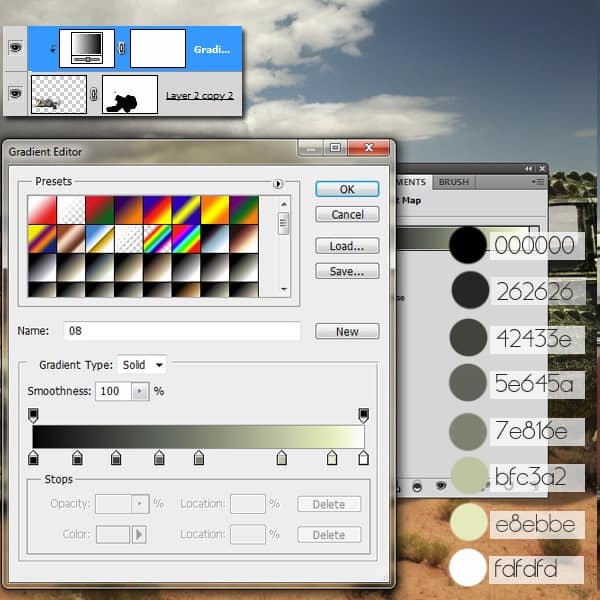
Next we will apply some adjustment layers. First start with Gradient Map ( set the opacity to 20%). You have the presets on the picture below.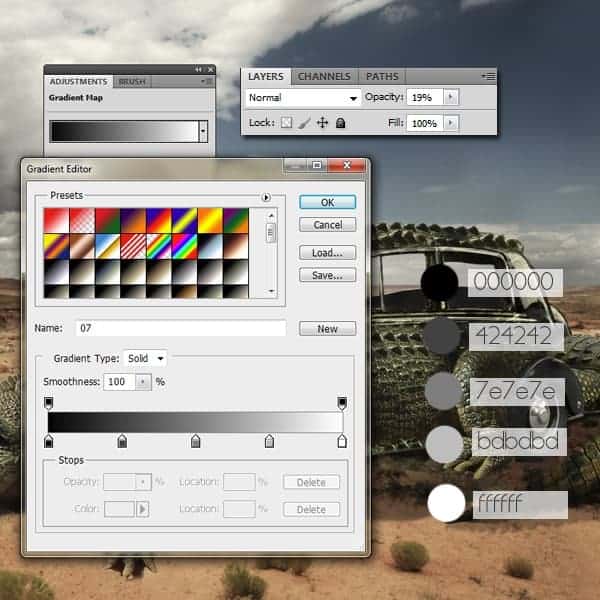
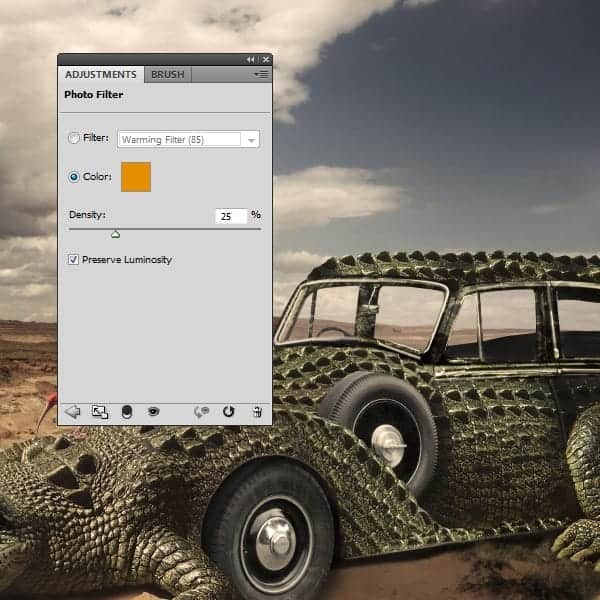
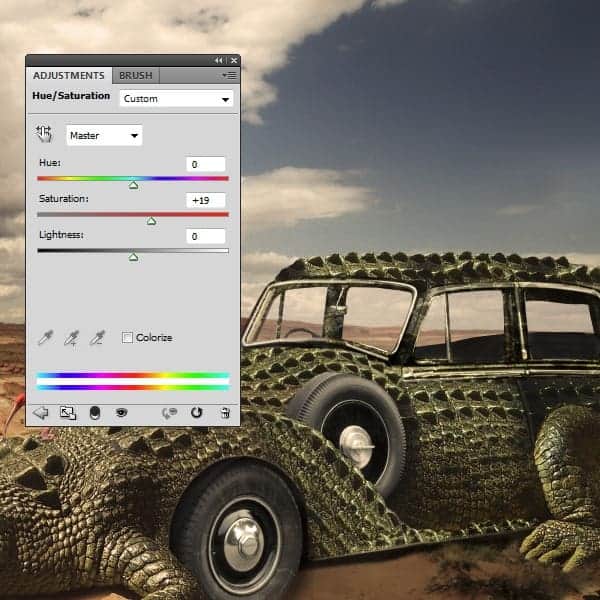
Step 14
Now we will create the dust particles. Create a new layer. Select the colors you see in the picture below. With a basic brush with soft edges start painting the dust. This should look like in the image below. Decrease the brush size many times so you will have different sizes of dust. Change the dust’s colors as many times as you can. I used the same dust particle on the entire image by duplicating the first layer. For all the dust used here I used about 25 different layers ( duplicated layers from the first one)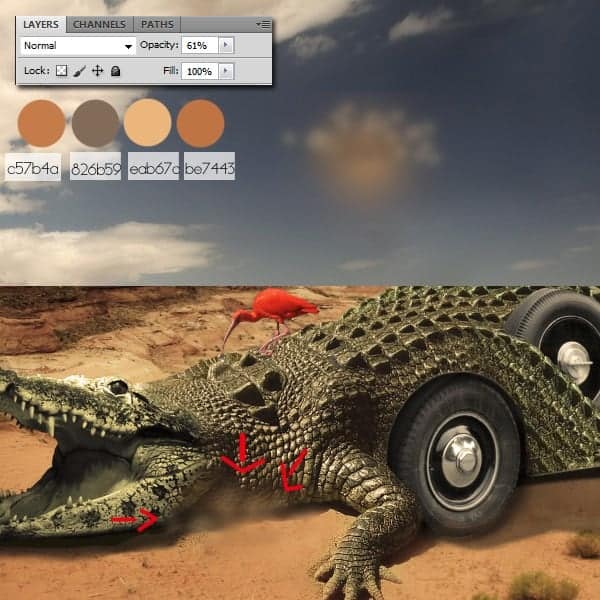
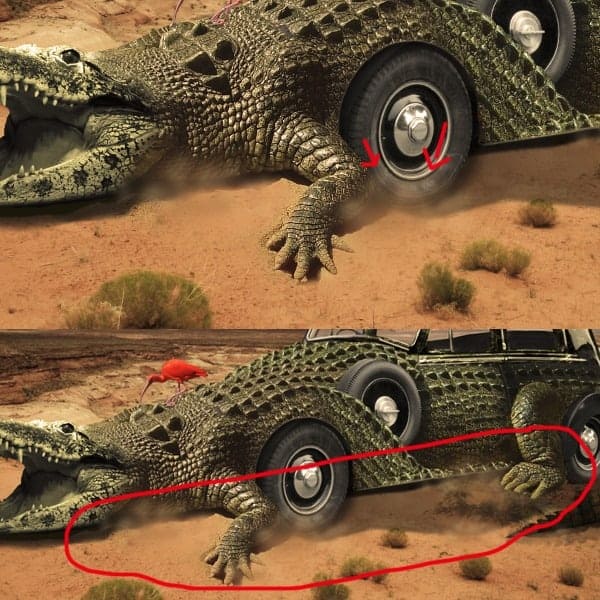
Step 15
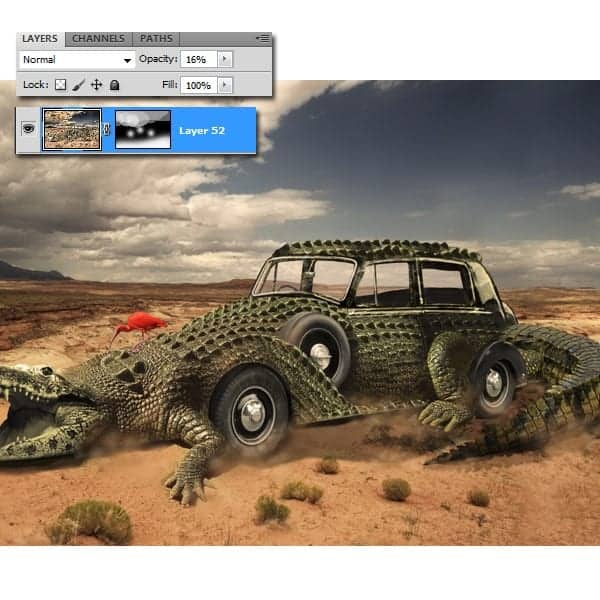
To add some interesting texture I used a Photoshop plug-in named Lucis Art. If you don’t have this plug-in don’t worry because I will explain how to achieve almost the same effect by using only the basic Photoshop filters. Now, if you have Lucis Art, create a visible stamp and use plaid 3. Decrease the opacity to 16% and don’t use it on the mountains. This area should remain a bit blurry.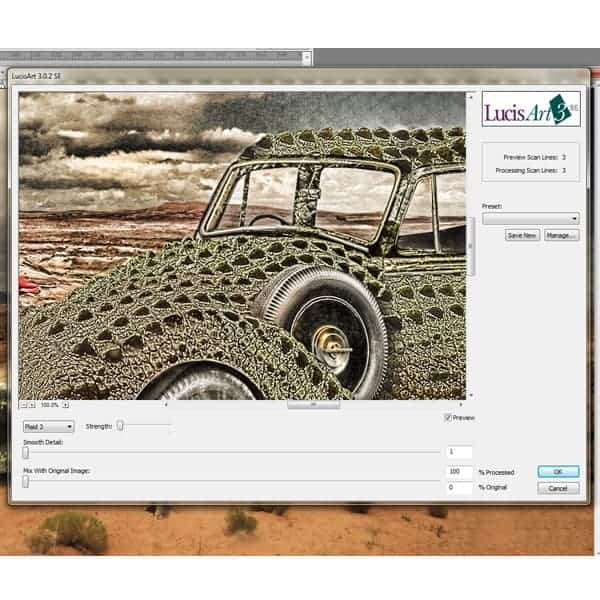
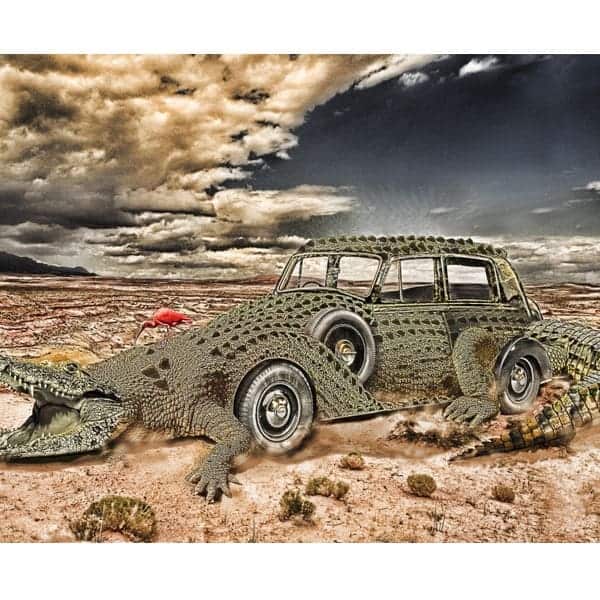
Step 16
This step is only for the ones that don’t have the Lucis art Plug-in. Create a visible stamp and go to Filters-High Pass ( Radius 2,4%) The smaller the radius is, the bigger the amount of details will be on the image. Set the blending mode to overlay.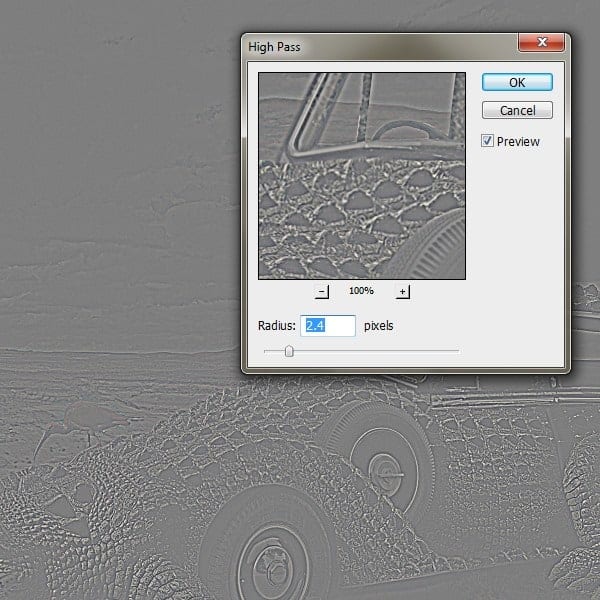

Step 17
Next let’s create the sign in the back. Place the first piece in the back and add some curves to lighten it. Write the word Nowhere and clip it on the sign’s layer.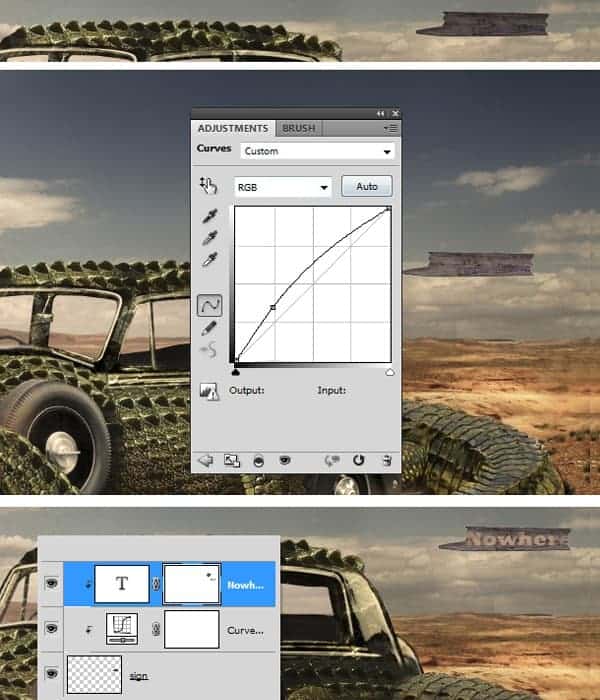
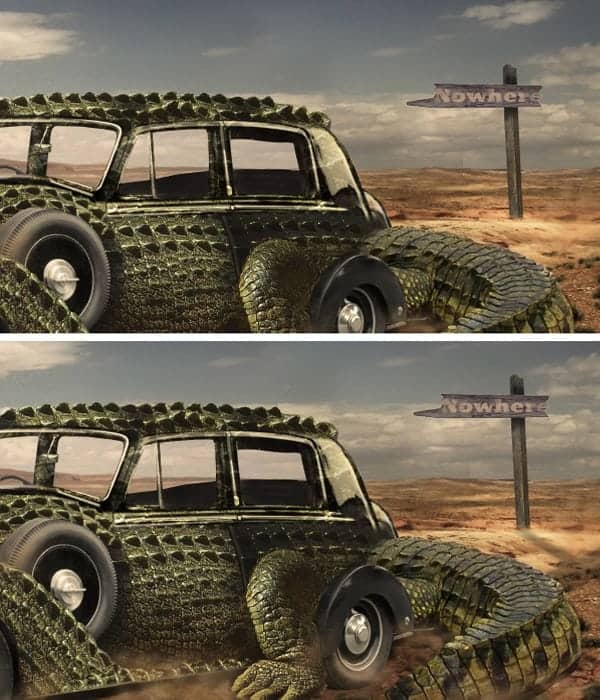
Step 18
Go to the Adjustment layers- Hue Saturation. Set the saturation to +47. Hide on the layer’s mask some parts , as you see in the image.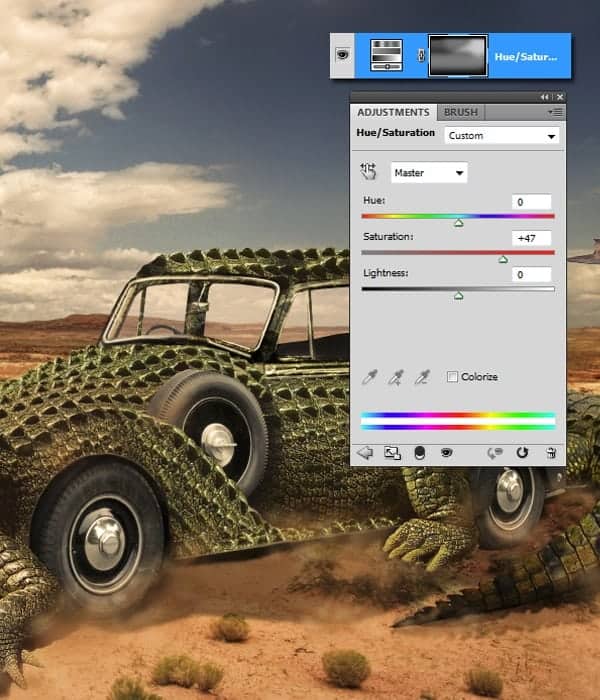
Step 19
Use the Lucis Art plug-in one more time ( Filter-High Pass, for those who don’t have it). Use it only on the sign, on the crocodile’s texture and the sky. Set the layer’s opacity to 39%.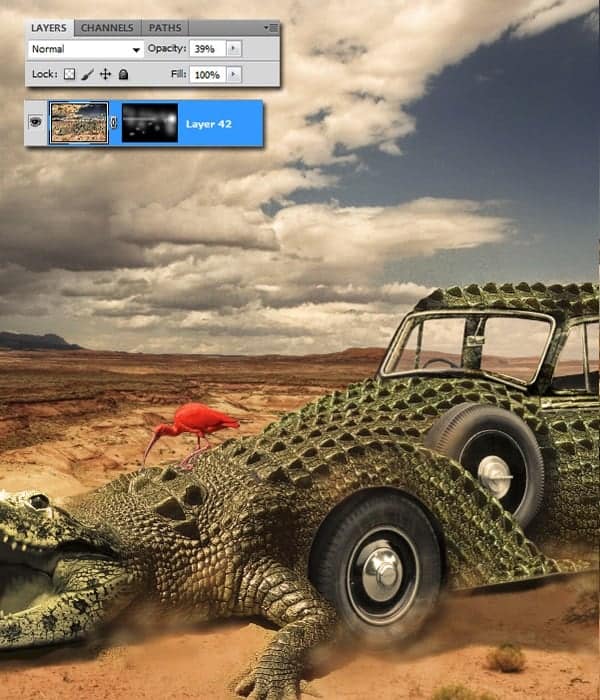
Step 20
Go to the Adjustment layers- Curves to add some shadows into the corners. Do the same with Hue-Saturation. Use the same mask on both layers.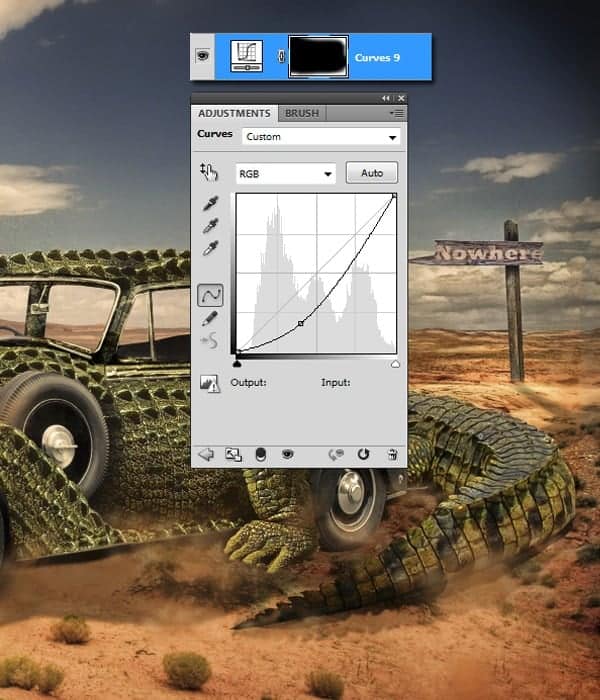

Step 21
Go to the Adjustment layers-Levels (opacity 30%)
Step 22
Go to Filters – Liquify and fix the roof top because it’s bit to high and the perspective it’s not right.
Step 23
In this step we will make the wheels look like they are spinning. Cut out the wheel. Go to Filters-Blur-Radial blur. Place it on top of the car’s wheel. Do the same with the back wheel.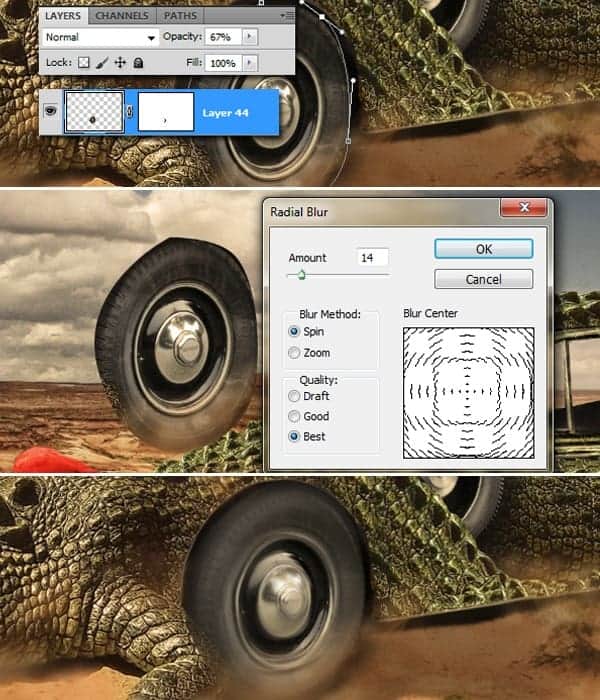
Step 24
Create a visible stamp. Go to Filters- Blur-Motion blur (set the amount to 50 and the angle to 10). This filter will be used at the back of the car so it will look like the car is moving.
Step 25
Go to the Adjustment Layers-Gradient map. You have the presets below.
Step 26
Blur the mountains in the back. Use the blur tool or go to Filters-Gaussian blur.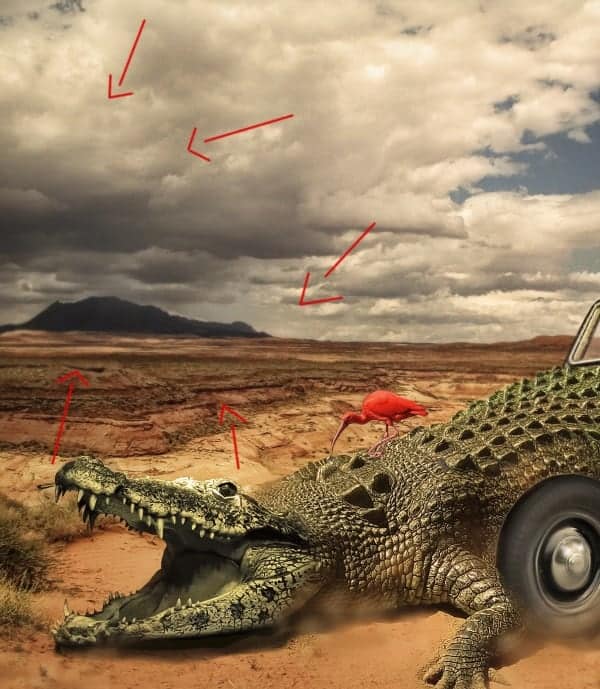
Step 27
Create a visible stamp and go to Filter-Filter Gallery –Dry Brush. Use the basic Photoshop presets. Set the layer’s opacity to 18%.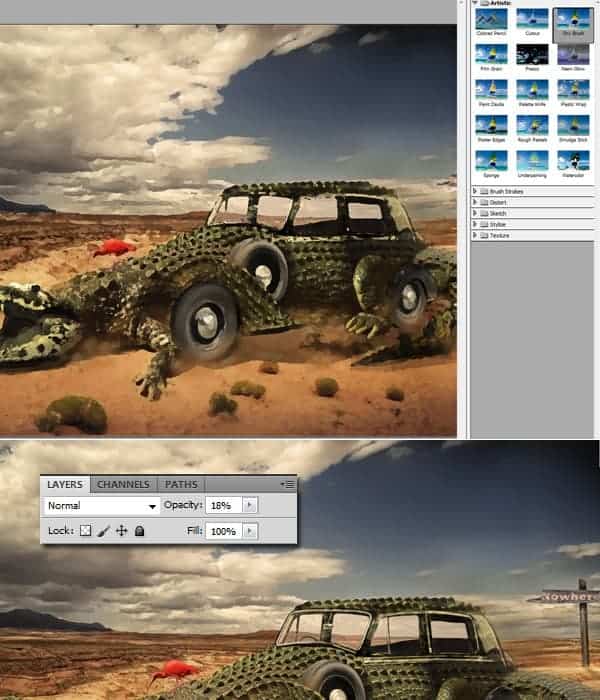
Step 28
Go to the Adjustment Layers-Curves.
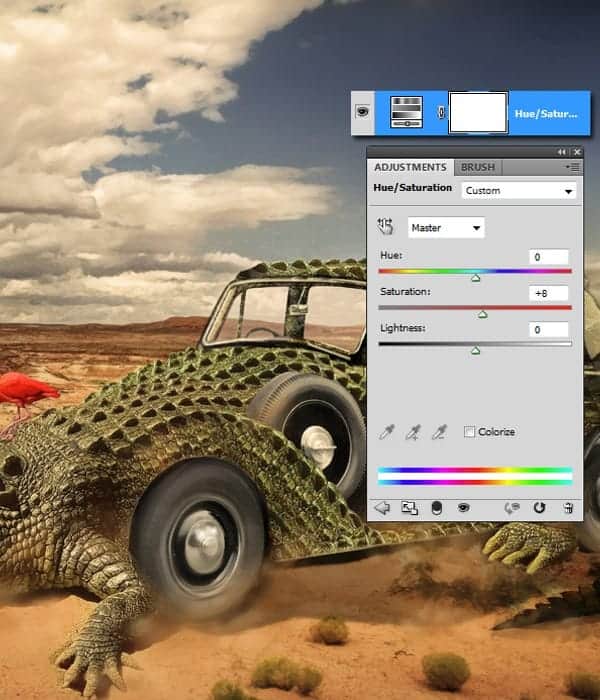
Final Results


![[Hack] DomiNations V2.0.81 LATEST VERSION JAILBREAK](https://blogger.googleusercontent.com/img/b/R29vZ2xl/AVvXsEgs6SJAU-z94ah7z-edusl2FHUiup6ZreQFeN5A9wjW5JxN0OrUrW6xmxEWP6cRTdX1gMi6dW1DEhUz700IB-PBuk1u1uzZ0ERCgldqLeuMgGhbfz-wCw-phIhyphenhyphen9Ks2zpoO_mDa8lrxvLv7/s72-c/10458386_338295233048481_6718903324450773386_n.jpg)

0 comments: