[Tutorial] Nocturn Fantasy Photo Manipulation in Photoshop
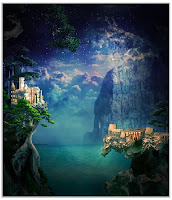
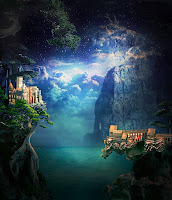 In this Photoshop Tutorial we are going to learn how to create our own portrait of a fantasy dreamy nighty panorama. We will learn unique technique on how to set mood dealing with sharpening images, lightning and selection.
Click Images To En large Them For Instructions
- Resources needed:
- Rock LINK
- Bonsai and Rock Pack LINK
- Texture LINK
- Mist LINK
- Castle LINK
- Nebula LINK
- Cloud LINK
- Sea LINK
- Misty sea LINK
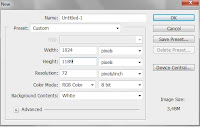 Step 1
Start by creating a new blank document of 1024 pixels wide and 1189 pixels high.
 Step 2
Open misty sea picture on the document. Hit Ctrl+T to activate free transform tool. Scale the picture up to fit the document. Try to get the result like the one I did. I named this layer background.
 Step 3
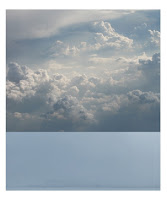
Now open cloud picture. In this step we are going to add some cloud texture to the background we have created. Hit Ctrl+T to activate the free transform tool again and do scaling to the picture and place it where needed. I just named this layer cloud on the layer panel.
 Step 4
Still with the cloud layer selected, go to layer > layer mask > reveal all. This means that we create a layer mask to the selected layer. With black color and a very soft round brush, stroke the area to be masked. (marked in red)
 Step 5
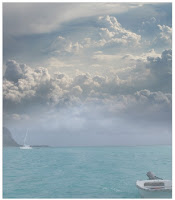
Open again the other stock picture in the document. Scale and place the picture in such size and position that it fits the composition we want. Please take a look at the screenshot given for your inspiration. I named this layer cloud and sea.
 Step 6
Mask the upper part of this picture just like the way we did in previous step. Take a look at the red marked part in the screenshot to find out the area to be masked.
 Step 7
Now reduce the opacity of the cloud and sea layer to 47%.
 Step 8
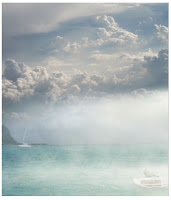
To add more nuance to the background we have created, we are going to give it gentle mist. Open the morning mist picture on the document. Scale it to get the size needed and place it to lower part of the document. I called this layer mist.

Step 9
Masked the upper part of the mist picture.
 Step 10
Still with the mist layer selected, hit Ctrl+J to duplicate it into a new layer called mist copy in the layer panel. Set the blending of both layer to overlay at 100% opacity.
 Step 11
Next, select both layer mist and layer mist copy in the layer panel. Hit Ctrl+G to group them. Then, give this group a layer mask. Mask some parts of this group (marked in red in the screenshot). Set the blending of this group to 60 % opacity.

Step 12
Set the blending of this group to 60 % opacity. See we have a nice background now.
 Step 13
From this step on, we are going to prepare objects needed to compose the scane of the portrait. I started by adding rock to it. Open the stock picture. What we should do is hit W on the keyboard to activate Magic Wand Tool with which we will select the the background of the stock picture and delete it. Set the setting of magic wand tool as shown on the screenshot. Just click the black background. This action will select all the black color around. Next hit Del to delete the black background.

Step 14
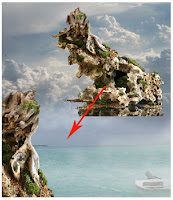
Activate eraser tool and erase unneeded part of the rock.
Step 15
Add the rock to the main document. Scale the size and locate it to left corner of the document. I called it left main rock.
 Step 16
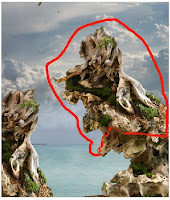
Dulicate the rock layer and move the duplicarion layer to the right corner. Erase unneeded upper part of it (marked in red). Let’s just call it right main rock.
 Step 17
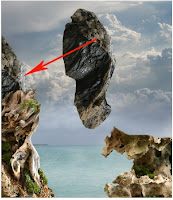
We are going to add more rock behind the left main rock. Open the other stock picture. Now hit P to activate the pen tool. Trace the rock of the stock picture by clicking it around until the path is closed which indicated by thin white line arouns the rock. Right click on the closed path, this will show path command option box. Choose Make path Selection. After the rock is selected, hit Shift + Ctrl + I to inverse the selection. Finally, hit Del to delete the background.
 Step 18
Add the rock behind the left main rock.
 Step 19
We will add more object to the document : tree. Open the bonsai tree picture. Hit Select > Color Range. This will show color range option box. Point out the cursor to the bonsai document, we will notice that the cursor changes into eye drop icon. Click the background of the bonsai picture. It means that we have sampled the color to be selected. We will see in the color range option box there is a clear contrast between the background and the tree. Set the Fuzziness to 152 to give more contrast. Click Ok. Now we can see, we have selected the background.

Step 20
Next, we have to edit the selection. Go to select > edit in quick mask mode. We can see that the most part of tree is highlighted in red. Paint black marked parts of the tree with black and the green marked ones with with ( please see the screenshot). Then, go back to normal selection. Hit Del to clear the background.
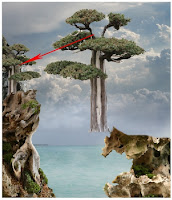
Step 21
Add the tree to the main document.
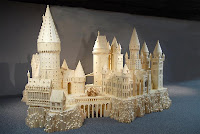 Step 22
Now we are going to add castle to the scane. We use this stock for that purpose :
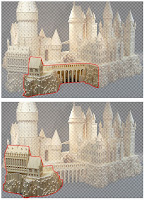 Step 23
What we should do now is cropping the castle. Please refer back to previous step 17 on how to use pen tool to crop the castle. Take a look at the screenshot to know which parts of the stock picture to be cropped (marked in red).
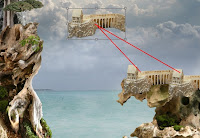 Step 24
After cropping the castle, add the first cropped castle to the scane. Duplicate it one time and place them on the the right main rock. Mask the lower parts of them to blend them well with the rock. Use a very soft brush for this purpose.
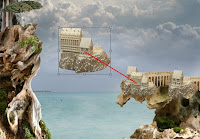 Step 25
Add the other cropped castle to the main document.
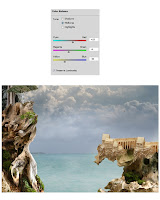 Step 26
Next, adjust the color of the castles to fit and blend well with the rock on which they are supposed to stand. Go to layer > new adjustment layer > color balance. Set the setting of color balance as shown in the screenshot.
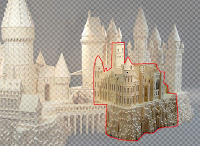 Step 27
Crop again part of the castle. We are going to add another castle to left main rock.
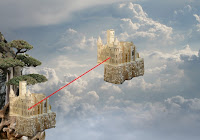 Step 28
Just add the castle to the main document and place it on the left rock.
Step 29
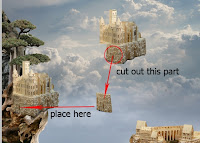
With pen tool, crop left lower part of the castle and then use the cropped part to cover the blank in the bottom of the main castle.
Step 30
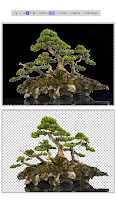
I decided to add more trees to the scene. The tree should be place in front of the left castle. Open the other bonsai stock. Please refer to previous step on how to use magic wand tool to to selection to an object.
 Step 31
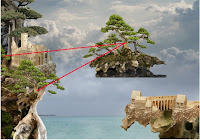
Finally, add the tree to the document. Masked the lower unnecessary parts of the tree. See the screenshot for your inspiration.
Step 32
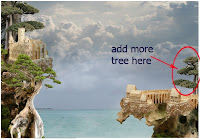
I decided to add a tree behind the right castle. I just simply duplicate the previously used tree in steps 19-21.
 Step 33
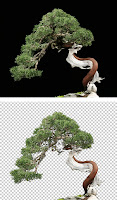
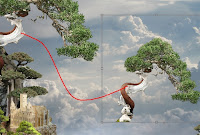
Finally, to balance the composition of the scene, I added another tree to the document. The tree is supposed to be the foreground of the scene. Please refer back again to previous steps on how we should use magic wand tool to crop the tree.
 Step 34
Now just simply scale and arrange its placement to the main document.
 Step 35
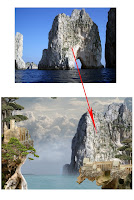
Another object we need to add to the document is another rock. Open the rock picture. Mask the unnecessary parts of it. It is supposed to be a distant rock.
 Step 36
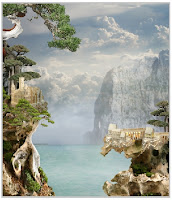
Give the the distant rock a bit gaussian blur by going to filter > blur > gaussian blur. Set its radius to 1 pxls. To define more depth, reduce its opacity to 37 %.
 Step 37
Well, we have completed the composition of the scene. From this step, we will set the mood of the image. The idea of this work is creating fantasy picture set in a dreamy night feel. Firstly, we will add stars to the sky. Open the nebula picture behind the distant rock. Mask the lower part of it. Then, set its blending to soft light. I named this layer stars.
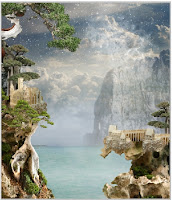 Step 38
Duplicate the stars layer. Set the duplication layer to screen blending mode at 60 % opacity.
 Step 39
Next, create a new layer (Shift + Ctrl + N) behind the distant rock and fill (Shift +F5) it with black. Mask the middle part of this layer. Then, set its blending to soft light at 100 % opacity.
 Step 40
Now we are going to give more retouching to the objects displayed in the scene. I started by retouching the left main rock. Go to the left main rock layer in the layer panel. Hit Ctrl + J to duplicate it. Then, with the duplication layer selected, go to filter > others > high pass. When the high pass option box comes up, set it to 1-2 pixel radius. Next, go to dodge tool in the tool panel. Choose a very soft round brush. Set its exposure to 5-10. Stroke the parts to be high lightened. Finally, set the blending of this layer to multiply at 40 % opacity.
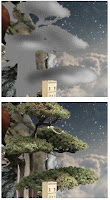
Step 41
Do the same as in step 40 for the other objects needed to be retouched. For example, the tree. Try to switch between dodge and burn tool to give highlight and shading on the areas needed.

Step 42
Now let’s give the scene adjustment layer. Go to layer > new adjustment layer > color balance. Please see the screenshot for the setting.

Step 43
Now we will give the scene a texture. Open the texture in the document. Try to scale its size to fit the document. Set it to overlay blending at 73% opacity.

Step 44
Next, let’s add more tree adjustment layers to the scene. The screenshot shows us in detail about them and their settings.

Step 45
Finally, for the last adjustment, I gave the scene brightness/contrast adjustment layer. Mask the upper and lower parts of this layer. Set it to normal blending at 100% opacity.
 Step 46
Create a new layer. Set the foreground color to black. Activate brush tool. Choose a very soft round brush ( 0 % hardness ). Set the brush to 10-12 % opacity. With the new layer still selected, stroke the edges of the document.
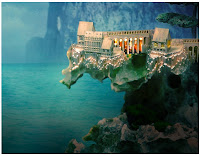 Step 47
In this step, we are going to add light to the castle. Please take a look at the screenshot to see the result I created. Here is the steps I did: firstly, create a new layerabove the castle layer. Fill this layer with black and set its blending to color dodge. Then, activate the brush tool. Choose a very soft round brush. Set it to 5-7% opacity. Next, make sure the foreground color is set to white. Finally, stroke the brush gently to the areas supposed to set light. Try to vary the color meaning that we are able to use the other bright colors like yellow, light green, or orange.
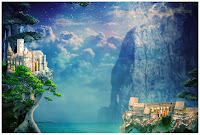 Step 48
Do the same as in the step 47 for the other castle.
 Step 49
Ok, this is the final retouch I did. Hit Shift + Ctrl + Alt + E to stamp all layers. This will create a new single layer above the other layers. Then go to filter > others > high pass. Set its radius to 1-2 %. Finally, with the new layer still selected, go to image > apply image. Please see the screenshot for the setting of the apply image.
Step 50
Set the new layer to overlay blending at 100% opacity.
Duplicate the new layer two times. Go to dodge tool again in the tool panel. With the first duplication layer still selected, stroke the dodge tool to the area to be lightened ( see the screenshot). Set this layer blending to soft light at 100% blending. Now, select the second duplication layer. Mask edge of this layer so it just reveal the middle part of it. Set this second layer to color dodge at 57% opacity.
Final Result
Previous Tutorial Next Tutorial


![[Hack] Fifa 14 v1.0.2 for iPhone/iPad/iPod NO JB](https://blogger.googleusercontent.com/img/b/R29vZ2xl/AVvXsEh3DLN_lhqJ62My7UH5erbJNyGNNaU660uTpwmIsPpOYFXUqvaZNL6LGlhZAjntjPnTe50mfd2yqnRFlyz-S3GDrjlv6OdmMCL493dUParZhydZtrW_YnvIdnM-E2KdJ_IuymqcrjECii3n/s72-c/fifa+14+unlocked.jpg)
![[HACK] Contract Killer 2 v3.0.2 NO JB For iPhone/iPad/iPod](https://blogger.googleusercontent.com/img/b/R29vZ2xl/AVvXsEj8pB2nYWUMFJ9D_Yp6cL60c3dLDc2M_YuPeYVPriT36KhJTWTOV-fZkcrmBL-WTu1_HxoyPr-AQRfyI-9qvhI-0MmSkbdn9XRIgKGYOIHctc2E6W7rwZbxUl53GA0ZD8n-W8sLBjU2MeKi/s72-c/contract+killer.jpeg)
![[HACK] Clash of Clans Fan Wiki NO JB For iPhone/iPad/iPod](https://blogger.googleusercontent.com/img/b/R29vZ2xl/AVvXsEhlJAaHMQyeyAcfL9nvKFWm4J35qtBhFHC842dk7LPUpM98rh2Swcd7rASXu0E2R5cPOFgluHvIDrSLYfF7BosCH0snZEjy2oTl9P_dTAKdhN8Stcl8CTpBea3Ebyo7cWbf1iA_dGE9DL48/s72-c/clash+Of+Clans.jpeg)
![[HACK] Basketball Showdown v1.5](https://blogger.googleusercontent.com/img/b/R29vZ2xl/AVvXsEiP82QT_LqlAkeKgM7Ov0Zjw1GgK4weNApBOXRyiAhPUqhmyjis3tXM7-DWUsmSSfy6r_jWqJsNOemZCqxNXrBSrFNKLFrXeq6JL1VowJDre-V_9TsCVYQSeRAdPEuSpuPA_lftRw6wQQNs/s72-c/IMG_2325.jpg)
0 comments: