How to Create a Mountainous Matte Painting in Photoshop

How to Create a Mountainous Matte Painting in Photoshop
Learn how to create this landscape matte painting with Photoshop! This tutorial will show you how create our own mountain scene by arranging multiple stocks together and blending them correctly using layer masks and adjustment layers. You will also learn effective techniques for adding waterfalls and mist.Preview of Final Results

Resources
- Sky -sxc.hu
- Background mountain – Stockfreeimages
- Left rock – Pixabay
- Right rock – Pixabay
- Mid rocks – Pixabay
- Trees 1 – sxc.hu
- Tree 2 – Morguefile
- Tree 3 – Morguefile
- Tree 4 – Stockfreeimages
- Bottom right rock – Stockfreeimages
- Waterfall 1 – Pixabay
- Waterfall 2 – Morguefile
- Arch 1 – Morguefile
- Arch 2 – Stockfreeimages
- Ruin 1 – sxc.hu
- Ruin 2 – Morguefile
- Ruin 3 – sxc.hu
- Mist brushes – Ideasplayer
Step 1
Create a new document and fill it with white or any light and bright colors. I choose the size with 1300×900 px. Open sky stock. Use Rectangular Marquee Tool (M) to make a selection on sky part as shown below:

Step 2
Open background mountain stock.Take the background with misty mountains only and place it at sky part (don’t resize it):

Click the second button at the bottom of Layer Panel to add layer mask to this layer. Now use soft black brushes with large size (I use 250-260 px) to paint on the top of this background to reveal sky added in first step:
Step 3
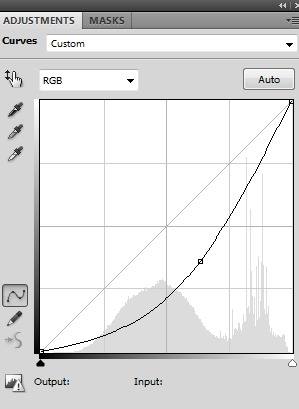
To reduce saturation and increase brightness of the mountains to fit the sky, I use some adjustment layers with Clipping Mask. On background mountain layer, go to New Layer-New Adjustment Layer-Hue/Saturation:
Curves


Step 4
Open mid rocks stock. Extract them and locate them at the middle section of our picture. Right click this layer, choose Convert to Smart Object then use Cmd/Ctrl+T to resize it as shown below:

Now on layer mask use black brush to remove selected areas:

Step 5
I create some adjustment layers to change color and darken the rocks.Hue/Saturation: Curves: Color Balance:


I use soft black brush with opacity about 40% to blur dark effect on the top of the rocks (they will get more light from sky so should be brighter than the rest):

Step 6
I add a new layer (Clipping Mask) to darken more the front of the rocks. Use soft brush with color #7a7e7e to paint over there avoiding the top and middle area then change the mode to Multiply 80%:
Step 7
Extract the right rock and position it at the right of our main picture after converting it to Smart Object and resizing. I set this layer under mid rocks one:
I use layer mask to remove a small white part of this rock:

Step 8
I make some adjustment layers (Clipping Mask) to blend the right rock:Curves: Hue/Saturation: Color Balance:


Step 9
I want to correct color in the front of this rock so I make a new layer (Clipping Mask) and choose color #a9a9ac (picked from the top of the rock) and paint on indicated area. I change the mode to Color 50%:
Step 10
I make a new layer and use brush with color #7a7e7e to paint on the right of this rock to darken it. Put the mode to Multiply 100%:
Step 11
I use a new layer and take soft white brush to create some mist at the top left of the rock. Then I lower opacity of this layer to 30% (remember to vary opacity of this brush to get the result below):
Step 12
I make a new layer (Clipping Mask), change the mode to Overlay 100% and fill with 50% gray:
I use Dodge Tool with Midtones Range and Exposure about 15% to brighten a small part of the left stroke of the rock a little. You can see how I applied this tool with Normal mode and result with Overlay mode:

Step 13
Isolate the left rock and move it to the left of the picture and make it as a Smart Object and downsize it. I make the top part of it visible:
I add a Curves layer (Clipping Mask) to darken this rock:

Step 14
I make two new layers (Clipping Mask) and use soft brush with color #7a7e7e to darken the front of this rock that’s hidden from the main light source. I change the mode of these layers to Multiply 80% and 70%:


Step 15
Create a new layer (Clipping Mask) and use soft brush with color #e9eded to paint on the top left of this rock. I lower opacity of this layer to 20% to create some mist for this part:
Step 16
Make a new layer (without Clipping Mask) above left rock ones but under the mid rocks. Use soft brush with color #e9eded to paint between the rock ones to make a misty effect there. I lower opacity to 20%:
Step 17
Open waterfall 1 stock. Extract the waterfall only (I use Channels to do it) and place it at the middle area of mid rocks after converting it to Smart Object and resize it. Flip it horizontally (Edit-Transform-Flip Horizontal):

Add layer mask to remove the right side:

I name this layer “waterfall 1 part 1″.
Step 18
Copy a part from waterfall stock and position it at the top of waterfall 1. After making it as a Smart Object, I use Warp Tool to bend it:
I use layer mask to remove unnecessary parts and blend this part with part 1:

Step 19
To change color and darken these layers together, make them selected and hit Cmd/Ctrl+G to make group for them. Change the mode of this group from Pass Through (default group mode) to Normal 100%. Go to New Layer-New Adjustment Layer-Hue/Saturation:


Step 20
Extract waterfall 2 and move it to the left rock after flipping it horizontally and use layer mask to remove unwanted parts:

On Curves layer mask, I use soft black brush to erase the top part of the waterfall as it gets light more than the bottom:

Step 21
Open trees 1 stock. First I remove most of background from the tree using Channels. Then I copy some tree parts to paste into the mid rocks, remember to convert them to Smart Object before resizing:

You can use layer mask to remove unwanted parts.
Step 22
Make group for these trees as done with waterfall 1. I use a Curves layer to darken and change color these trees as they’re too bright:
I use soft black brush and paint on the left of a tree as it should get some light from sky:

Step 23
Open arch 1 stock. Take the part of the arch and place it at the middle part of mid rocks after converting it to Smart Object, flipping horizontally and transforming it using Cmd/Ctrl+T. I use layer mask to remove the sides of it and make it blended with the rocks:
Step 24
I use Hue/Saturation and Color Balance layers (Clipping Mask) to change color of this arch.

Step 25
Isolate ruin 1 and locate it at the top of the mid rocks. As usual, I convert it to Smart Object and downsize it to fit:

Step 26
I add three new adjustment layers (Hue/Saturation, Color Balance, Curves) to change color and darken this ruin:
After darkening with Curves I use soft black brush to erase the left side as it gets more light than the right:

Step 27
Open ruin 2 stock. I take only the right part and place it on the top of mid rocks, beside the ruin 1 and remove the bottom with layer mask:

Step 28
To change color and brightness of this ruin, I use Hue/Saturation, Color Balance and Curves:
Erase the left side on Curves layer mask to make this brighter than the right:

Step 29
Do the same with ruin 3. I place it at the top left of mid rocks:


Step 30
Make a new layer with same settings in step 12. I use Burn Tool to darken the right side a little:
Step 31
I extract a part from arch 2 stock, convert to Smart Object and position it beside the ruin 3. I set this layer under ruin 3 one. Then I use Warp Tool to bend it as shown below and use layer mask to remove unwanted parts

Because it’s converted to Smart Object so you can tweak it freely without losing quality and even can turn it into original form later.
Create some adjustment layers for this arch:


Step 32
Create a new layer on the top. Change brush to mist ones and set foreground to #e9eded. I choose the brush below to paint at the bottom of our picture:


Duplicate this layer and lower opacity to 50%. Mask it to get the result below:

Step 33
Extract bottom right rock and add it to the right edge of foreground after making it as a Smart Object:
Use layer mask to remove a small tree on the top of this rock:

Step 34
I use two adjustment layers to revise color and darken this rock:
Hue & Saturation: Color Balance:


Step 35
To create some depth for our picture, on this rock layer, go to Filter-Blur-Gaussian Blur and apply radius as 2,5 px:
Step 36
Extract tree 2 stock and put it into the hole of left rock:


Step 37
Open tree 3 stock. Isolate the tree at the bottom right and position it at the bottom left of our main document and don’t forget to convert it to Smart Object:

Darken and change color of it with Curves and blur with Gaussian Blur filter (2,5 px):


Step 38
Take tree 4 and situate it at the top right of our picture, transform to get the look below:
Make color and brightness of this tree fit the background with Color Balance and Curves:


Step 39
We finished adding all elements. Now it’s time for blending. Create some adjustment layers on the top.Gradient Map:

Lower opacity of this Gradient Map layer to 20%.
Color Balance:

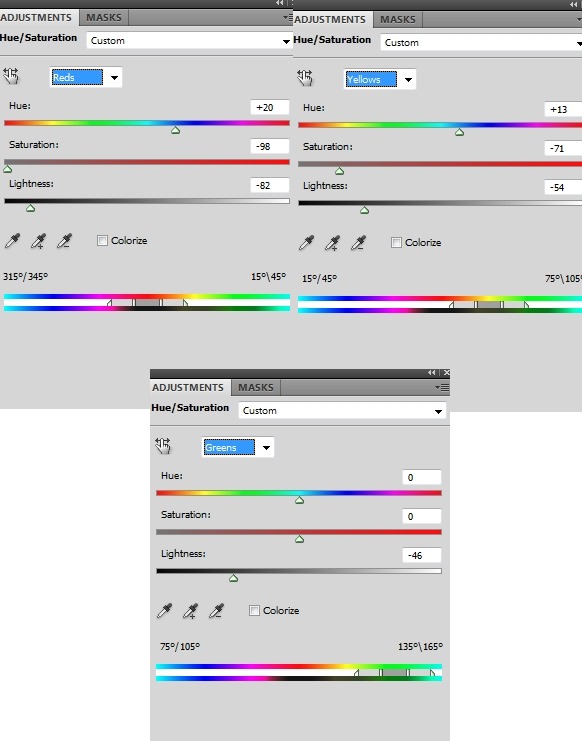
Hue/Saturation:


Step 40
I use two new layers and take soft brush with color #f3ebe1 to make some mist and brighten the top of picture, especially the left. I set the first layer to Soft Light 30% and the second to Overlay 70%:

RESULT

DOWNLOAD PSD


![[Hack] Fifa 14 v1.0.2 for iPhone/iPad/iPod NO JB](https://blogger.googleusercontent.com/img/b/R29vZ2xl/AVvXsEh3DLN_lhqJ62My7UH5erbJNyGNNaU660uTpwmIsPpOYFXUqvaZNL6LGlhZAjntjPnTe50mfd2yqnRFlyz-S3GDrjlv6OdmMCL493dUParZhydZtrW_YnvIdnM-E2KdJ_IuymqcrjECii3n/s72-c/fifa+14+unlocked.jpg)


0 comments: