[Tutorial] Create an anti smoking concept design in photoshop
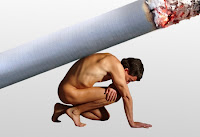
In this Photoshop Tutorial we will use stock images, brush, transform tools and text tool to create an anti-smoking poster design. I hope the techniques useful , also the final result gives a clear message and all people can turn the awareness of the danger of smoking into concrete actions.
Resources needed:
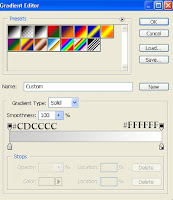 Step 1:
Create a new layer (1200x1000 px) and fill it with white. Add a new layer above background and fill it with Linear Gradient:
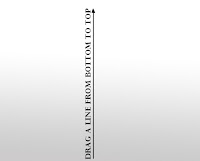
Drag a line from bottom to top we have:
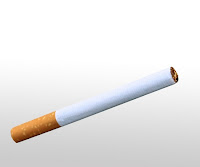
Step 2:
Open cigarette 1 stock. Isolate cigarette from background and move into our document, position it as shown below:
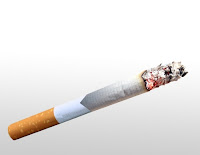
Also move cigarette 2 that is cut out from original and place it on the end of cigarette 1, remember to scale it to fit the size of cigarette 1 :
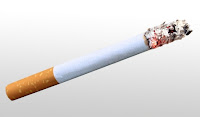
Add Layer Mask and use soft black brush to make only the burning end of cigarette 2 remain:
 Create a new layer above cigarette 1 layer with Clipping Mask option, name it "darken cigarette":
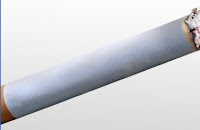
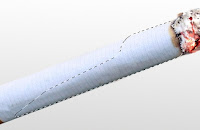 Use soft brush, color #767575 to paint on cigarette 1 and set this layer to Multipy 60%:
Step 3:
Cut man from stock, resize and place him under cigarette (man layer is set under cigarette layers also):
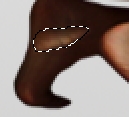
Now we will fix the light on man's foot:
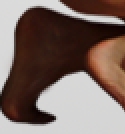
Create a new layer, use Clone Tool to paint over this light part:
 Also create a new layer under man layer. Use brush, color #1c1c1c, Opacity and Flow 60-70% to paint under man feet, leg, hand to make shadow for him:
 Step 4:
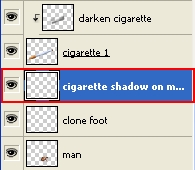
Create a new layer between man and cigarette layers:
 Use soft black brush with Opacity and flow 60-70% to make the trace of cigarette pressed on man's back:
Step 5:
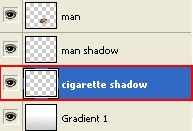
Create a new layer and set it above Gradient layer in step 1.

 Use Retangular Marquee Tool to make a selection under man and cigarette, set feather = 4 and fill it with black. Lower Opacity to 50%, add layer mask to erase it to make it look like cigarette shadow:
 Step 6:
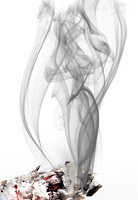
Make a new layer above cigarette layers. Set foreground to a brown one (i choosed #6a6969) and background to white. They will be the colors of smoke that we will add now. Remember that if you set foreground to white and background color to a brown tone, the result will be totally different.
Grab smoke brush, choose number 2192, 1091,( or any you like) and diameter 490-500 px to paint on top of cigarette:
 Step 7:
In next steps we will make cigarette ash . Choose layer of cigarette 2 ( that has burning end), use any tool you want to make a selection on it:
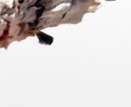 Right click this selection, choose Layer via Copy, then move and transform it as shown below:
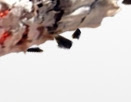
Duplicate this layer twice, transform them to get different motions:
 Step 8:
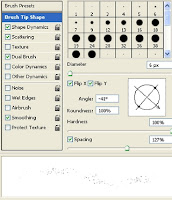
Create a new layer, select hard brush, 6 px, color #323130 and give it parameters as screenshots below show:
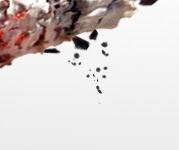 Paint under ashes in previous step:
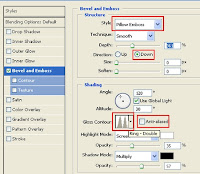 Right click this layer, choose Blending Options:
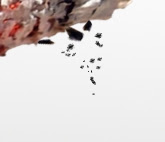 We have result:

Step 09:
On a new layer, use brush with same settings in step 8 to make ash on floor (and same layer style):
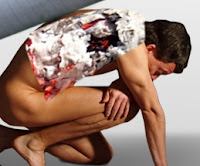
 Step 10:
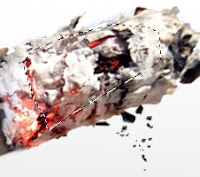
Hide smoke layer temporarily. Choose cigarette 2 layer again, make a selection on its burning end, set feather=0.5 then copy it into a new layer (choose Layer via Copy or use Ctrl+C to copy, Ctrl+V to paste). Move it on man body:
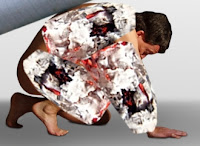
Duplicate it twice and set different motions:
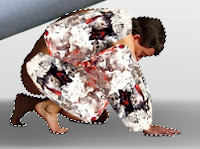
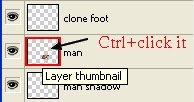 Merge these three layers. Use Ctrl+Click on the man layer to load his selection:
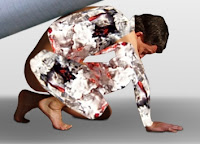
Ctrl+Shift+I to invert this selection. Press Delete to clear the parts out of man body:
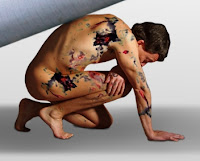 Change the Mode to Darken 100%:
You can erase (use Eraser tool or layer mask) this burning effect on any part you don't like.
 Step 11:
Create a new layer with Overlay mode:
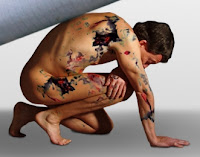
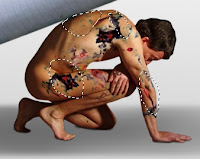
Use Burn Tool to darken some parts of burning effect on man body:
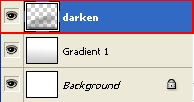 Step 12:
Turn on smoke layer. Create a new layer above Gradient layer in step 1. I name it "darken":
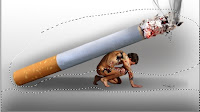 Use soft brush, color #5e5e5e to paint behind cigarette and foreground as shown below:
 Step 13:
New layer, use soft white brush, Opacity and flow 50-60% to paint the space between man and foreground:
 Step 14:
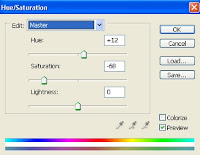
Create a new Hue/Saturation layer and set on the top:
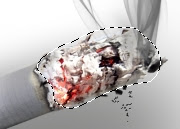 Use soft black brush to erase burning end of cigarette 2:
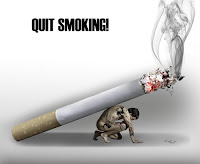 Step 15:
Create a new layer, use Text tool, color #030303, font Haettenschweiler (default window font), 105 px to type QUIT SMOKING! words on white part of background:
New layer, use font Gill Sans MT Ext Condensed Bold (default window font), 55 px to type words" it weakens you. it ruins you." and place under QUIT SMOKING! :
Resources needed:
 Step 1:
Create a new layer (1200x1000 px) and fill it with white. Add a new layer above background and fill it with Linear Gradient:

Drag a line from bottom to top we have:

Step 2:
Open cigarette 1 stock. Isolate cigarette from background and move into our document, position it as shown below:

Also move cigarette 2 that is cut out from original and place it on the end of cigarette 1, remember to scale it to fit the size of cigarette 1 :

Add Layer Mask and use soft black brush to make only the burning end of cigarette 2 remain:
 Create a new layer above cigarette 1 layer with Clipping Mask option, name it "darken cigarette":
 Use soft brush, color #767575 to paint on cigarette 1 and set this layer to Multipy 60%:
Step 3:
Cut man from stock, resize and place him under cigarette (man layer is set under cigarette layers also):

Now we will fix the light on man's foot:

Create a new layer, use Clone Tool to paint over this light part:
 Also create a new layer under man layer. Use brush, color #1c1c1c, Opacity and Flow 60-70% to paint under man feet, leg, hand to make shadow for him:
 Step 4:
Create a new layer between man and cigarette layers:
 Use soft black brush with Opacity and flow 60-70% to make the trace of cigarette pressed on man's back:
Step 5:
Create a new layer and set it above Gradient layer in step 1.

 Use Retangular Marquee Tool to make a selection under man and cigarette, set feather = 4 and fill it with black. Lower Opacity to 50%, add layer mask to erase it to make it look like cigarette shadow:
 Step 6:
Make a new layer above cigarette layers. Set foreground to a brown one (i choosed #6a6969) and background to white. They will be the colors of smoke that we will add now. Remember that if you set foreground to white and background color to a brown tone, the result will be totally different.
Grab smoke brush, choose number 2192, 1091,( or any you like) and diameter 490-500 px to paint on top of cigarette:
 Step 7:
In next steps we will make cigarette ash . Choose layer of cigarette 2 ( that has burning end), use any tool you want to make a selection on it:
 Right click this selection, choose Layer via Copy, then move and transform it as shown below:
Duplicate this layer twice, transform them to get different motions:
 Step 8:
Create a new layer, select hard brush, 6 px, color #323130 and give it parameters as screenshots below show:
 Paint under ashes in previous step:
 Right click this layer, choose Blending Options:
  We have result:
Step 09:
On a new layer, use brush with same settings in step 8 to make ash on floor (and same layer style):

 Step 10:
Hide smoke layer temporarily. Choose cigarette 2 layer again, make a selection on its burning end, set feather=0.5 then copy it into a new layer (choose Layer via Copy or use Ctrl+C to copy, Ctrl+V to paste). Move it on man body:

Duplicate it twice and set different motions:

 Merge these three layers. Use Ctrl+Click on the man layer to load his selection:
Ctrl+Shift+I to invert this selection. Press Delete to clear the parts out of man body:
 Change the Mode to Darken 100%:
You can erase (use Eraser tool or layer mask) this burning effect on any part you don't like.
 Step 11:
Create a new layer with Overlay mode:


Use Burn Tool to darken some parts of burning effect on man body:
 Step 12:
Turn on smoke layer. Create a new layer above Gradient layer in step 1. I name it "darken":
 Use soft brush, color #5e5e5e to paint behind cigarette and foreground as shown below:
 Step 13:
New layer, use soft white brush, Opacity and flow 50-60% to paint the space between man and foreground:
 Step 14:
Create a new Hue/Saturation layer and set on the top:
 Use soft black brush to erase burning end of cigarette 2:
 Step 15:
Create a new layer, use Text tool, color #030303, font Haettenschweiler (default window font), 105 px to type QUIT SMOKING! words on white part of background:
New layer, use font Gill Sans MT Ext Condensed Bold (default window font), 55 px to type words" it weakens you. it ruins you." and place under QUIT SMOKING! :


![[Hack] DomiNations V2.0.81 LATEST VERSION JAILBREAK](https://blogger.googleusercontent.com/img/b/R29vZ2xl/AVvXsEgs6SJAU-z94ah7z-edusl2FHUiup6ZreQFeN5A9wjW5JxN0OrUrW6xmxEWP6cRTdX1gMi6dW1DEhUz700IB-PBuk1u1uzZ0ERCgldqLeuMgGhbfz-wCw-phIhyphenhyphen9Ks2zpoO_mDa8lrxvLv7/s72-c/10458386_338295233048481_6718903324450773386_n.jpg)

0 comments: