[Tutorial] Create a beautiful wallpaper in photoshop
Resources needed:
- Couple LINK
- Castle (Arch 2 by Intoxicated stock) LINK
- Sky (Saint-Jean-Cloudscape-II by somadjinn) LINK
- Space brushes LINK
- Light beams brushes LINK
- Sparklies brushes LINK
Remove the sky from the image as shown.
I used refine edge tool for a neat selection of the tree and the couple.
I used refine edge tool for a neat selection of the tree and the couple.
The settings for refine edge tool are shown.
Step 2
Now open the sky image in photoshop. Place it as shown.
Now open the sky image in photoshop. Place it as shown.
Step 3
Now load the space brushes and select stardust brush. Using white brush paint stars. You will get the image shown below.
Now load the space brushes and select stardust brush. Using white brush paint stars. You will get the image shown below.
Step 4
Now open the castle image in photoshop. Resize it and place the castle as shown below.
Now open the castle image in photoshop. Resize it and place the castle as shown below.
Step 5
Apply layer mask to the castle as shown below.
Apply layer mask to the castle as shown below.
 Step 6
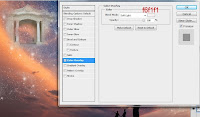
Apply color overlay to the castle. Choose the color f6f1f1 and set the blending mode to soft light.
Step 7
Now using the light beams brush, paint on the centre of the castle as shown.
Now using the light beams brush, paint on the centre of the castle as shown.
Step 8
Paint more light beams as shown below.
Paint more light beams as shown below.
Step 9
Using sparklies brush, paint on the castle and also near the tree as shown. This step gives a heavenly look to the castle.
Using sparklies brush, paint on the castle and also near the tree as shown. This step gives a heavenly look to the castle.
Step 10
Apply photo filter. The settings are shown below.
Apply photo filter. The settings are shown below.
Step 11
Apply color fill. I have applied a blue color as shown below.
Apply color fill. I have applied a blue color as shown below.
 Step 12
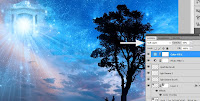
Now change the color fill layer's blending mode to soft light and reduce the opacity to 50%.
 FINAL IMAGE
This is the final image we get. It will look amazing as your wallpaper. Hope you guys enjoyed reading my tutorial.
:)


![[Hack] DomiNations V2.0.81 LATEST VERSION JAILBREAK](https://blogger.googleusercontent.com/img/b/R29vZ2xl/AVvXsEgs6SJAU-z94ah7z-edusl2FHUiup6ZreQFeN5A9wjW5JxN0OrUrW6xmxEWP6cRTdX1gMi6dW1DEhUz700IB-PBuk1u1uzZ0ERCgldqLeuMgGhbfz-wCw-phIhyphenhyphen9Ks2zpoO_mDa8lrxvLv7/s72-c/10458386_338295233048481_6718903324450773386_n.jpg)

0 comments: