[Tutorial] Create a beautiful fantasy scenery using photoshop
In this Photoshop Tutorial we will create a beautiful landscape scenery using Photoshop. You will learn how blending modes are applied and how they make a huge difference to our images!
Resources needed:
 Step 1
Open the Landscape image in Photoshop
 Step 2
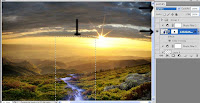
Open the waterfall image. Using layer mask erase the edges except the water part. Place it as shown. Change the blending mode to lighten.
Step 3
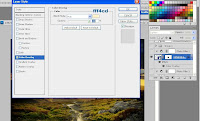
Apply color overlay to the waterfalls. Apply the following settings.
 Step 4
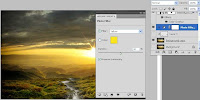
Apply photo filter to the waterfall layer. Make sure you right click and select the 'create clipping mask' option.
 Step 5
Similarly apply photo filter to the background layer. Make sure you right click and select the 'create clipping mask' option.
 Step 6
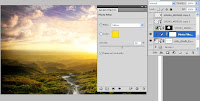
Open the sky image and drag it on a new layer. Uisng a soft brush erase the edges of the sky so that it blends with our image.
Change the blending mode of the sky to screen.
Step 7
Now apply photo filter to the sky layer with clipping mask option.
 Step 8
Open the tree image. Remove the background and drag it to a new layer. Change the tree layer's blending mode to multiply.

Step 9
Apply photo filter to the tree with clipping mask option.
 Step 10
Open the peacock image. Remove its background and place it as shown.You can notice that on the right side of the peacock, feathers are less. So we need to add more feathers to the peacock.
 Step 11
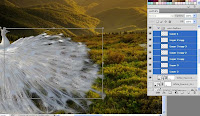
This is done by simply copy pasting the feathers and blending it with your peacock image. Blending is done by erasing some un necessary feathers. You can see in the layers panel that I had duplicated the feathers several times and arranged it appropriately.
 Step 12
Now apply photo filter to the peacock layer with clipping mask. You can notice that the photo filter settings are the same till now. This consistent setting of the photo filter blends our image elements.
 Step 13
Now open the planet and remove its background. Place it as shown. Change the blending mode of the planet to overlay.
 Step 14
Apply outer glow and inner glow to the planet. The
settings are shown below.

Step 15
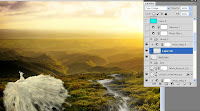
Create a new layer above the landscape layer. Change its blending mode to soft light. Paint shadows of the tree and the peacock with a soft black brush of low opacity.
 Step 16
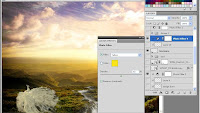
Now with a light yellow color paint the highlights on the peacock. Make sure its painted on a new layer above the peacock. Change its blending mode to color dodge.
Step 17
Similarly paint highlights around the tree on a new layer. Change its blending mode to linear dodge.
 Step 18
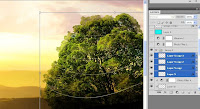
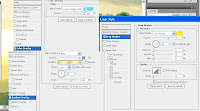
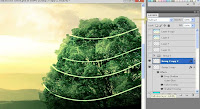
Create a new layer. Draw several lines around the tree. I used the pen tool to draw these lines. However you can draw with your favorite tool. I drew 4 lines on 4 layers. I applied outer glow to each of these lines.
Step 19
Merge the lines of the tree. Change its blending mode to multiply.
Apply blending modes-- drop shadow, color overlay and gradient overlay to this merged lines layer.
 Step 20
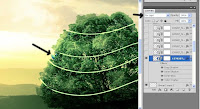
Duplicate the merged lines layer. Change the blending mode to subtract.
 Step 21
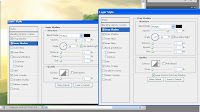
Now add a planet(fruit) on our tree. Change its blending mode to pin light.
 Step 22
Apply inner shadow and drop shadow to the planet(fruit).
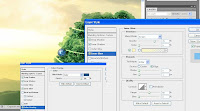 Step 23
Also apply color overlay and inner glow to the fruit planet.
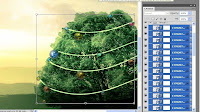 Step 24
Duplicate the fruit planets several times and arrange them randomly. Re-size the fruits accordingly. By changing the color in the color overlay option the color of the fruit changes. Also erase the edges of the fruits with a low opacity so that the fruits blend with the tree.
 Step 25
Paint highlights and shadow to the tree. This is because we have now added fruits to it.
You can see a huge difference in the tree now.
Your image looks like this now. We will see a few more steps which will enhance our image and bring it to life. Keep reading.

Step 26
Apply photo filter. This is applied below the tree fruits/planets layer.
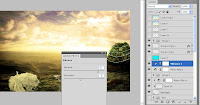
Step 27
Apply vibrance.
 Step 28
Create a new layer with soft light mode. Fill with a blue color and reduce the layer's opacity to 50%.
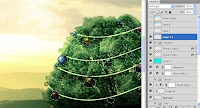
Step 29
Paint shadows/highlights to the tree's planets using a black/white soft brush.
 Step 30
Create a new layer with color burn blending mode. Paint with a yellow color on the tree, landscape and peacock...also paint with a blue color on the sky. Make sure that you paint with a very low opacity around 10-15%. I duplicated this layer to enhance our image. You can see that layer 8 and layer 8 copy are the two layers.
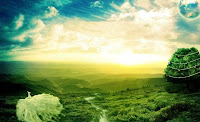
Final Result:
This is the final image we get!! Hope you enjoyed reading my tutorial! :)
Resources needed:
- White Peacock by maplerose-stock LINK
- Pink Clouds LINK
- Landscape LINK
- Tree LINK
- Planet LINK
- Waterfall LINK
 Step 1
Open the Landscape image in Photoshop
 Step 2
Open the waterfall image. Using layer mask erase the edges except the water part. Place it as shown. Change the blending mode to lighten.

Step 3
Apply color overlay to the waterfalls. Apply the following settings.
 Step 4
Apply photo filter to the waterfall layer. Make sure you right click and select the 'create clipping mask' option.
 Step 5
Similarly apply photo filter to the background layer. Make sure you right click and select the 'create clipping mask' option.
 Step 6
Open the sky image and drag it on a new layer. Uisng a soft brush erase the edges of the sky so that it blends with our image.
Change the blending mode of the sky to screen.

Step 7
Now apply photo filter to the sky layer with clipping mask option.
 Step 8
Open the tree image. Remove the background and drag it to a new layer. Change the tree layer's blending mode to multiply.

Step 9
Apply photo filter to the tree with clipping mask option.
 Step 10
Open the peacock image. Remove its background and place it as shown.You can notice that on the right side of the peacock, feathers are less. So we need to add more feathers to the peacock.
 Step 11
This is done by simply copy pasting the feathers and blending it with your peacock image. Blending is done by erasing some un necessary feathers. You can see in the layers panel that I had duplicated the feathers several times and arranged it appropriately.
 Step 12
Now apply photo filter to the peacock layer with clipping mask. You can notice that the photo filter settings are the same till now. This consistent setting of the photo filter blends our image elements.
 Step 13
Now open the planet and remove its background. Place it as shown. Change the blending mode of the planet to overlay.
 Step 14
Apply outer glow and inner glow to the planet. The
settings are shown below.

Step 15
Create a new layer above the landscape layer. Change its blending mode to soft light. Paint shadows of the tree and the peacock with a soft black brush of low opacity.
 Step 16
Now with a light yellow color paint the highlights on the peacock. Make sure its painted on a new layer above the peacock. Change its blending mode to color dodge.
Step 17
Similarly paint highlights around the tree on a new layer. Change its blending mode to linear dodge.
 Step 18
Create a new layer. Draw several lines around the tree. I used the pen tool to draw these lines. However you can draw with your favorite tool. I drew 4 lines on 4 layers. I applied outer glow to each of these lines.

Step 19
Merge the lines of the tree. Change its blending mode to multiply.
Apply blending modes-- drop shadow, color overlay and gradient overlay to this merged lines layer.
 Step 20
Duplicate the merged lines layer. Change the blending mode to subtract.
 Step 21
Now add a planet(fruit) on our tree. Change its blending mode to pin light.
 Step 22
Apply inner shadow and drop shadow to the planet(fruit).
 Step 23
Also apply color overlay and inner glow to the fruit planet.
 Step 24
Duplicate the fruit planets several times and arrange them randomly. Re-size the fruits accordingly. By changing the color in the color overlay option the color of the fruit changes. Also erase the edges of the fruits with a low opacity so that the fruits blend with the tree.
 Step 25
Paint highlights and shadow to the tree. This is because we have now added fruits to it.
You can see a huge difference in the tree now.
Your image looks like this now. We will see a few more steps which will enhance our image and bring it to life. Keep reading.

Step 26
Apply photo filter. This is applied below the tree fruits/planets layer.

Step 27
Apply vibrance.
 Step 28
Create a new layer with soft light mode. Fill with a blue color and reduce the layer's opacity to 50%.

Step 29
Paint shadows/highlights to the tree's planets using a black/white soft brush.
 Step 30
Create a new layer with color burn blending mode. Paint with a yellow color on the tree, landscape and peacock...also paint with a blue color on the sky. Make sure that you paint with a very low opacity around 10-15%. I duplicated this layer to enhance our image. You can see that layer 8 and layer 8 copy are the two layers.

Final Result:
This is the final image we get!! Hope you enjoyed reading my tutorial! :)


![[Hack] DomiNations V2.0.81 LATEST VERSION JAILBREAK](https://blogger.googleusercontent.com/img/b/R29vZ2xl/AVvXsEgs6SJAU-z94ah7z-edusl2FHUiup6ZreQFeN5A9wjW5JxN0OrUrW6xmxEWP6cRTdX1gMi6dW1DEhUz700IB-PBuk1u1uzZ0ERCgldqLeuMgGhbfz-wCw-phIhyphenhyphen9Ks2zpoO_mDa8lrxvLv7/s72-c/10458386_338295233048481_6718903324450773386_n.jpg)

0 comments: