[Tutorial] How to create a broken sphere in Photoshop
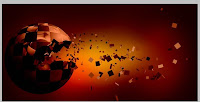 In this Photoshop Tutorial I am going to show you the steps of making a broken and hollow sphere. I used Adobe Photoshop CS 5 to make the image but other versions are also applicable.
Resources needed:
- Source Image LINK
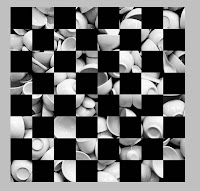 Step 1:
Take a new file. Size 1000px * 1000px
Drag and place any image on the page. I have used an image prepared by me.
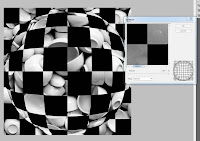 Step 2:
Go to Filters - Distort - Spherize. Change the amount to 100%. Click OK.
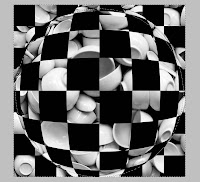 Step 3:
Now click on Elliptical Marquee Tool. With Shift pressed make a huge circle, almost equal to the size of the sphere. Place the selection in center so that the sphere comes within the circle.
Then Press Shift + I to invert the selection.
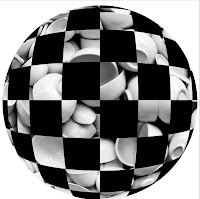 Step 4:
Press Delete. Now all we have is the sphere.
 Step 5:
Go to File - New. Let the width be 2600px and height be 1300px. Change the Foreground Color to #1e687a and Background Color to #000000 (Black). Use radial gradient to fill the background layer.
Don't close the previous file.
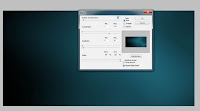 Step 6:
 Go to Filters - Distort - Wave
Number of generation: 40
Wavelength: Min 1, Max 714
Amplitude: Min 5, Max 35
Click OK
 Step 7:
Go to Edit - Fade. Change the Opacity to 55%. Click OK.
 Step 8:
Now drag the sphere from the previous file to this new file. Name this layer "sphere"
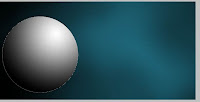
Step 9:
Ctrl + Click the thumbnail on the "sphere" layer, the sphere will get selected. Take a new layer, fill the selection with radial gradient with foreground white and background black. Call this layer "gradient".
 Step 10:
Change the layer Blending Mode to "Hard light". Now merge the Gradient and sphere layer. Name the layer "Front". Press Ctrl + D to deselect all.
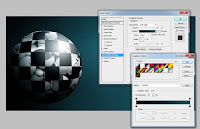
Step 11:
Go to layer styles by double clicking the "Front" layer. Click Gradient Overlay. Change the Blend Mode to Soft Light and the color to #000000 and #1e687a. Change the angle to 135. Click OK.
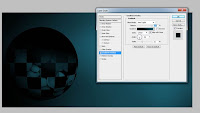
Step 12:
Copy the "Front" layer. Place it below the "Front" layer. Call this layer "Behind". Hide the "Front" layer. Go to the layer style of "behind" layer. Change the Angle to -98 and Scale t0 61 and Bend Mode to Hard Light. Click OK.

Step 13:
Unhide the "front" layer. Take a new layer. Use Polygonal Lasso Tool to create the shape shown in the image below. Fill it with white color just in case you deselect the selection. Name this layer "crack".

Step 14:
Hide the "behind" layer. Select the "Front" layer. Ctrl + Click the "crack". Now press Delete.
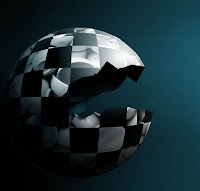
Step 15:
Go to "behind" Layer. Unhide the "behind" layer. Press M. Now place the selection little lower. Press delete.
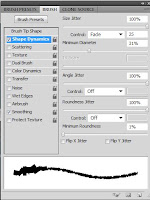
Step 16:
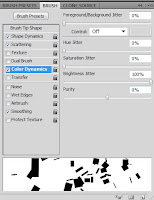
Now take square brush. Change the Shape Dynamics of the Brush.
Size Jitters: 100%
Control: Fade
Control: FadeControl: Fade
Angle Jitter: 100%
Roundness Jitter: 100%
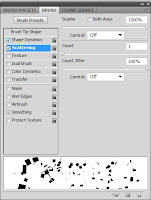
Step 17
Scatter: 100%
Count: 1
Count Jitter: 100%
Step 18
Color Dynamics
Brightness Jitters: 100%
Step 19
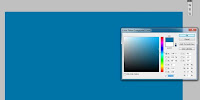
Take a new layer on the top of all layers. Fill it with #0073a8.

Step 20:
Now change the layer Blending Mode to Subtract.
Step 21:
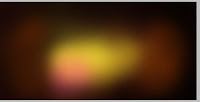
Take a new layer Start painting it using soft brush i.e. Hardness - 0. Paint the layer with colors as shown in the image. Place this this layer above the background layer.
Change the layer Blending Mode to Linear Dodge(Add).
 Final Result:
DONE.. Hope you like it!


![[Hack] DomiNations V2.0.81 LATEST VERSION JAILBREAK](https://blogger.googleusercontent.com/img/b/R29vZ2xl/AVvXsEgs6SJAU-z94ah7z-edusl2FHUiup6ZreQFeN5A9wjW5JxN0OrUrW6xmxEWP6cRTdX1gMi6dW1DEhUz700IB-PBuk1u1uzZ0ERCgldqLeuMgGhbfz-wCw-phIhyphenhyphen9Ks2zpoO_mDa8lrxvLv7/s72-c/10458386_338295233048481_6718903324450773386_n.jpg)

0 comments: