[Tutorial] Halloween Photoshop Manipulation
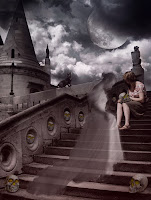
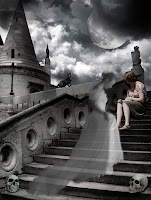
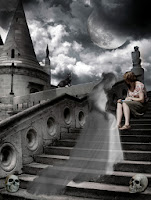
Since Halloween is just around the corner I thought it's time for a horror tutorial. Well.. not such a scary one, but just enough to fit the holiday.
Doing this tutorial you'll learn how to use Layer Mask and Layer Adjustments. Also, the most important part, you'll learn how to make a living person appear more like a ghost. It may sound complicated, but it's not. It will only take you a few minutes to do it.
So, let's take this images and start our Photo Manipulation!
Resources needed:
Step 1:
Take the background image an open it in Photoshop. The image looks ok as it is, you just have to add some more elements in it for the final image.
Step 2:
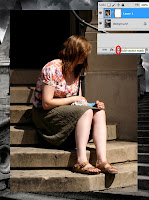
Open the image with the girl sitting on the stairs. Using Rectangular Marquee Tool select the girl and paste her in your project. Make sure you have black for the background color and the click on the "Add Layer Mask" icon, on the bottom of your Layer Palette.
Use a hard brush and mask the background from this image. Using this method you can always bring back parts of the image, just using a white brush instead a black one. Another method to cut the girl out of her picture is by using Pen Tool or Magnetic Tool. Whatever works better with you.
Step 3:
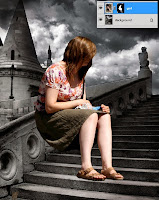
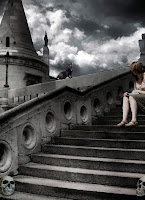
Use Free Transform to reduce the size of the girl. Also flip her horizontal and place her like in the image below :
Step 4:
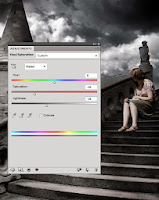
Hold down the Alt key and click on the "Create new fill and adjustments" icon. You can find this icon right next to the one you've used earlier. Select Hue/Saturation from the menu that appear. Use the next settings :
Step 5:
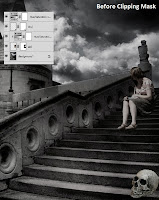
Bring one skull in the design and use mask for it, too. Duplicate the Hue/Saturation layer. You can select it and then hit Ctrl + J or, like I do, hold down the Alt key and drag the layer where you need it to be. In this case - above the layer with the skull. Now hold down Alt again and position your mouse pointer between the new Hue/Saturation layer and the skull layer. When the mouse pointer changes to two overlapping circles, click once. You've created a clipping mask, which means that transparent pixels in the bottom layer act as a mask for the image in the layer that's above it.
Do the same for the other skull. Let's some shadow to the skulls. Open the Layer Style Palette and check Drop Shadow. Use 117 for the Angle, 5 pixels for Distance, 0 pixels for Spread and 5 pixels for Size.
Step 6:
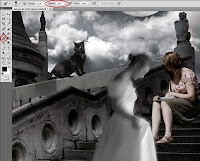
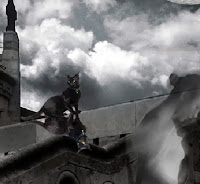
Place the image with the cat in the design, using the same technique. We'll come back to this layer, but for now leave it as you see below :
Step 7:
Now let's add the moon. Use the Elliptical Marquee Tool to select the moon. Place it as you see below:
Go to the background layer and copy the part that's under the moon. Paste it in a new layer, above all the others. Use Layer Mask and a big soft brush to reveal a part from the moon and to look as if it's coming out from the clouds.
Step 8:
It's time to make the ghost now. Place the other girl in the design and isolate her.
Go to Image > Adjustments > Desaturate. Now, duplicate this layer. Click on it's Layer Mask and select "Apply Layer Mask".
Go to Filter > Blur > Motion Blur. Set the Angle for 55% and the Distance to 24%.
Take the Eraser Tool, set the Opacity to 25% and erase over her face and hands.
Select both layers with the ghost and hit Ctrl+E to merge them. Now reduce the Opacity of the layer to 80%.
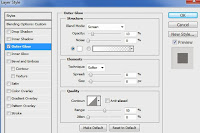
Apply an Outer Glow Effect from the Blending Option (right click on the layer) with the next settings:
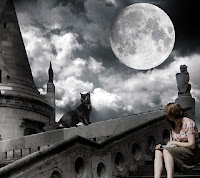
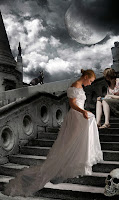
This is what you have so far :
Step 9:
Now return to the cat's layer. Because the moon is behind it you need to add the cat's shadow to the manipulation. Do that this way : duplicate the cat's layer and flip it horizontal. Place this layer under the original cat. Now you've lost the clipping mask that were over the original cat. Put it back just as you did a few steps earlier.
Place the shadow under the cat:
Go to Filter > Blur > Gaussian Blur and apply a Radius of 1.6 pixels. Reduce the Opacity of the layer to 51% and the Fill to 73%. Take the Eraser Tool, set it to a Soft Brush and erase the bottom part of the shadow. You now have the cat's shadow.
Step 10:
Let's add something more to the manipulation. Since we have skulls instead of the pumpkins let's light a candle inside them :)
Make a new layer over the skull from the left hand side. Take a soft brush, set the foreground color to yellow and start painting over the skull. Now place the yellow layer under the skull. Take the Pen Tool and select the skull's eyes and nose... or what's left of them .. :)
Go to the skull's layer mask, take a black brush and erase from selection.
Now take the Eraser Tool, set the Hardness to 100% and erase the yellow around the skull. Make a new layer above the yellow one and under the skull, take the Brush Tool and trace the eyes and nose. Set the Blending Mode for this layer to Soft Light and set the opacity to 82% and fill to 79%.
Set the >opacity for the yellow layer to 56% and fill to 88%.
Do the same for the other skull.
You can duplicate one skull and add it on the wall, as I did, but this is optional.
Step 11:
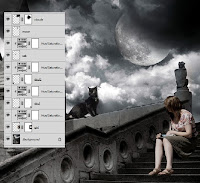
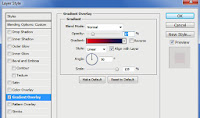
Let's add an overall color to the manipulation. Make a new layer, on top of the others. Fill it with black. Set the Blending Mode to Soft Light, Opacity to 37%, Fill to 43% and the next layer style:
Use for the red color : #e10019 and for the blue : #021253.







![[HACK] Subway Surfers Unlimited Coins (No Root)](https://blogger.googleusercontent.com/img/b/R29vZ2xl/AVvXsEjxXdVCStQjVqqu8moIKz7jF2LmqecaaWVrsFUP4JAbzDueqPH9lfRzlPd4VdBltin1SKN43JLHm26Uq-zcLEv-x2UdgDhk855qs5AQsaH9YazhEZj0HSV2T1PeQ3iVSH-s7mDIoArejlc8/s72-c/subway1.png)


0 comments: