[Tutorial] Create a dramatic action scene poster
In this Photoshop Tutorial we will use different stock images, transform tools, adjusting color layer style and brushes to create a dramatic action scene.
Resources needed:
Step 1:
Open building stock. Use Lasso Tool to select a part in the sky with feather = 20:
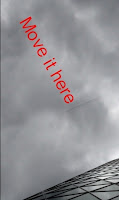
Copy this selection and paste into a new layer (right click, choose Layer via Copy or use Ctr +C to copy, Ctrl+V to paste). Move it up to hide a bright part in sky:
Use soft black brush on layer mask to erase any unnecessary parts:
Name this layer "Cloud 1".
Step 2:
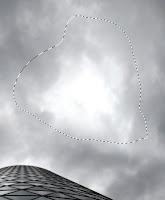
Continue with Lasso Tool to make a selection for bright part in the right of the pic:
Copy it into a new layer, and move it to the center of sky:
Name this layer "Cloud 2".
Copy Cloud 1 layer and move to the right to hide bright part there, remember to use Flip Horizontal from Edit option:
Name it as "Cloud 3".
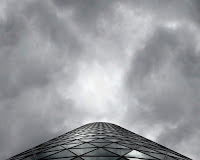
Lower Opacity of Cloud 2 layer to 70%.
 Step 3:
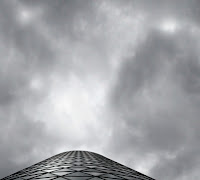
To increase dramatic effect for sky, I make a new layer on the top, use soft white brush to paint in some part of sky as shown below:
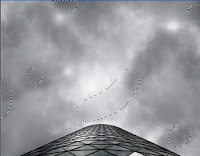 New layer again with Multipy Mode 20%, use soft brush, color #85868b to paint in some areas of sky to darken it:
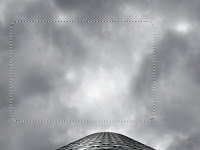 Step 4:
Hit Ctrl+Shift+Alt+E to merge all layers. Use Retangular Marquee Tool to make a selection in the sky with feather = 20:
Copy and paste into a new layer, then move and Flip Horizontal and erase it with soft black brush and layer mask to make the pic look like below:
Name it as "Cloud 4".
Step 5:
Come back to layer that is stamped visible. Hide Cloud 4 layer and use Polygonal Lasso Tool to create a selection for building then copy into a new layer, move above Cloud 4 layer. Call it Building. Turn on Cloud 4 layer and we have result:
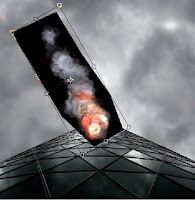
Step 6:
Open explosion stock. Cut one of these effects and place on building as the pic below shows:
Duplicate this layer and hide layer copy temporarily. Choose the first explosion layer, add layer mask and erase its border, black parts:
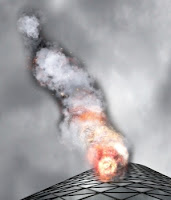
Dont worry if it does not look good, we will fix it right now. Turn on second explosion layer and set it to Screen 100%:
Create a new Curves layer above Second explosion layer with Clipping Mask:
Increase highlight:
 Step 7:
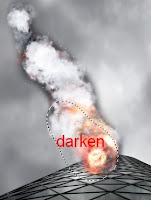
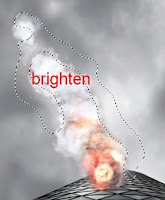
The explosion still does not look very good. So I create two new layers under first explosion layers with Clipping Mask option, use soft red and black brush to darken inside explosion on one layer and soft white brush on another to brighten and remove dark stroke outside:
This is what we have so far:
Step 8:
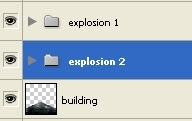
To finish first explosion effect, I use a layer under first explosion layer, above building layer. Use black brush, hardness 70% to paint under explosion:
Step 9:
Select all explosion layers and make group for them (Ctrl+G). Right click it and choose Duplicate Group. Set it under first explosion group.
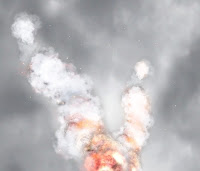
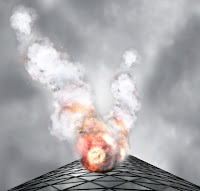 Scale second explosion to make effect look like below:
To change color on some part of second explosion, add a new layer with Overlay Mode 100% above that layer (and under first explosion). Use soft brush, color #fcbc8f to paint on areas like in screenshot below:
 Step 10:
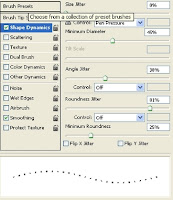
To make small fire spots that are thrown out from explosions, create a new layer on the top. Use soft hard brush 4 px with color #f3d6ad and settings as shown below to paint around explosions:

Step 11:
Cut the model and move into main document, remember to resize her to fit background:
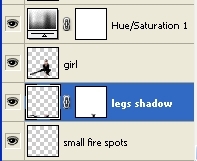
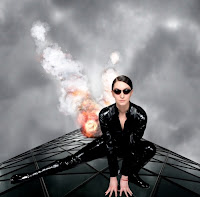 To make model color to be suitable for background, create a new Hue/Saturation with Clipping Mask option for model layer:
Step 12:
Now we will make shadow for girl (shadow for legs). We just need to make shadow for legs as in next steps , the part under girl hands will be darkened and it's impossible to see hands shadow. To make shadow for legs, duplicate girl layer. Apply Flip Vertical for under layer, move the shadow under model feet . Rename two layers as "girl" and "legs shadow":
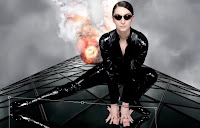
Use Ctrl+T to transform it:

Add Layer Mask to erase hands on legs shadow layer:
 Lower Opacity to 30%:

Step 13:
Create some new adjustment layers on the top:
Gradient Map:
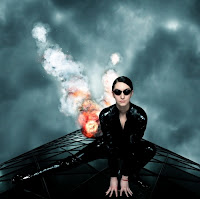
Set this Gradient Map Layer to Soft light 100%.
Selective color:
Reds: -100, 0, 0, 0
Neutrals: -13, -16, -20, 26
Step 14:
Add a New layer with Overlay mode:
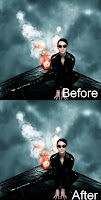 Use Dodge and Burn Tool to darken and brighten picture. You can see before and after this step:
Step 15:
Last step: Create some adjustment layers:
Color Balance:
Midtones: -29, -18, -11
Shadows: -12, 0, 0
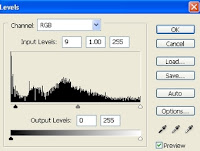
Levels:
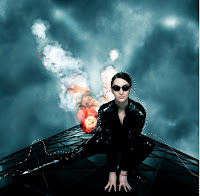 Use soft black brush to erase model and part around her on mask of Levels layer.
Final Result:
Download Psd[password-www.trickytuts.com]
Resources needed:
Step 1:
Open building stock. Use Lasso Tool to select a part in the sky with feather = 20:

Copy this selection and paste into a new layer (right click, choose Layer via Copy or use Ctr +C to copy, Ctrl+V to paste). Move it up to hide a bright part in sky:
Use soft black brush on layer mask to erase any unnecessary parts:
Name this layer "Cloud 1".

Step 2:
Continue with Lasso Tool to make a selection for bright part in the right of the pic:
Name this layer "Cloud 2".
Copy Cloud 1 layer and move to the right to hide bright part there, remember to use Flip Horizontal from Edit option:
Name it as "Cloud 3".

Lower Opacity of Cloud 2 layer to 70%.
 Step 3:
To increase dramatic effect for sky, I make a new layer on the top, use soft white brush to paint in some part of sky as shown below:
 New layer again with Multipy Mode 20%, use soft brush, color #85868b to paint in some areas of sky to darken it:
 Step 4:
Hit Ctrl+Shift+Alt+E to merge all layers. Use Retangular Marquee Tool to make a selection in the sky with feather = 20:
Copy and paste into a new layer, then move and Flip Horizontal and erase it with soft black brush and layer mask to make the pic look like below:
Name it as "Cloud 4".
Step 5:
Come back to layer that is stamped visible. Hide Cloud 4 layer and use Polygonal Lasso Tool to create a selection for building then copy into a new layer, move above Cloud 4 layer. Call it Building. Turn on Cloud 4 layer and we have result:

Step 6:
Open explosion stock. Cut one of these effects and place on building as the pic below shows:
Duplicate this layer and hide layer copy temporarily. Choose the first explosion layer, add layer mask and erase its border, black parts:

Dont worry if it does not look good, we will fix it right now. Turn on second explosion layer and set it to Screen 100%:
Create a new Curves layer above Second explosion layer with Clipping Mask:
Increase highlight:

 Step 7:
The explosion still does not look very good. So I create two new layers under first explosion layers with Clipping Mask option, use soft red and black brush to darken inside explosion on one layer and soft white brush on another to brighten and remove dark stroke outside:
This is what we have so far:
Step 8:
To finish first explosion effect, I use a layer under first explosion layer, above building layer. Use black brush, hardness 70% to paint under explosion:

Step 9:
Select all explosion layers and make group for them (Ctrl+G). Right click it and choose Duplicate Group. Set it under first explosion group.
 Scale second explosion to make effect look like below:
To change color on some part of second explosion, add a new layer with Overlay Mode 100% above that layer (and under first explosion). Use soft brush, color #fcbc8f to paint on areas like in screenshot below:

 Step 10:
To make small fire spots that are thrown out from explosions, create a new layer on the top. Use soft hard brush 4 px with color #f3d6ad and settings as shown below to paint around explosions:

Step 11:
Cut the model and move into main document, remember to resize her to fit background:
 To make model color to be suitable for background, create a new Hue/Saturation with Clipping Mask option for model layer:
Step 12:
Now we will make shadow for girl (shadow for legs). We just need to make shadow for legs as in next steps , the part under girl hands will be darkened and it's impossible to see hands shadow. To make shadow for legs, duplicate girl layer. Apply Flip Vertical for under layer, move the shadow under model feet . Rename two layers as "girl" and "legs shadow":

Use Ctrl+T to transform it:

Add Layer Mask to erase hands on legs shadow layer:
 Lower Opacity to 30%:
Step 13:
Create some new adjustment layers on the top:
Gradient Map:

Set this Gradient Map Layer to Soft light 100%.
Selective color:
Reds: -100, 0, 0, 0
Neutrals: -13, -16, -20, 26
Step 14:
Add a New layer with Overlay mode:
 Use Dodge and Burn Tool to darken and brighten picture. You can see before and after this step:
Step 15:
Last step: Create some adjustment layers:
Color Balance:
Midtones: -29, -18, -11
Shadows: -12, 0, 0
Levels:
 Use soft black brush to erase model and part around her on mask of Levels layer.
Final Result:
Download Psd[password-www.trickytuts.com]


![[Hack] Fifa 14 v1.0.2 for iPhone/iPad/iPod NO JB](https://blogger.googleusercontent.com/img/b/R29vZ2xl/AVvXsEh3DLN_lhqJ62My7UH5erbJNyGNNaU660uTpwmIsPpOYFXUqvaZNL6LGlhZAjntjPnTe50mfd2yqnRFlyz-S3GDrjlv6OdmMCL493dUParZhydZtrW_YnvIdnM-E2KdJ_IuymqcrjECii3n/s72-c/fifa+14+unlocked.jpg)


0 comments: